How to Store Homemade Jam: Fridge, Pantry, Freezer
Shelf life depends entirely on how the jam was made and sealed. Here is what lasts how long, how to spot spoilage, and whether freezing jam is worth it.
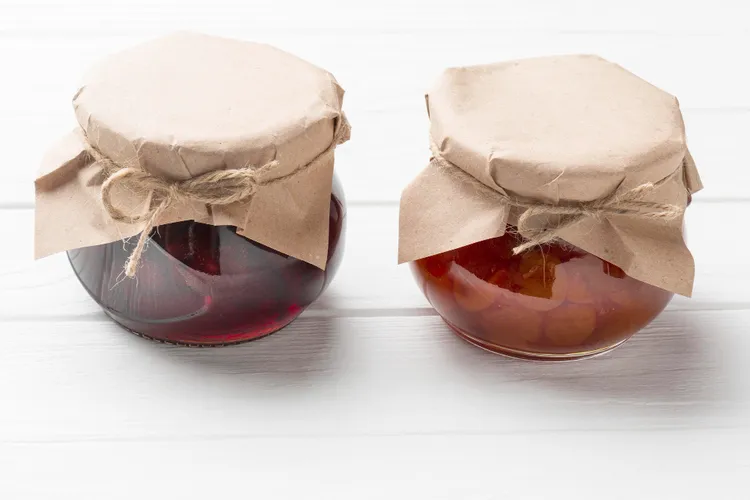
The shelf life of homemade jam varies enormously depending on how much sugar it contains, how thoroughly the jars were sterilised, whether a water bath was used, and how it is stored after opening. Understanding what you have made tells you exactly how to store it.
Pantry Storage (Sealed Jars)
Traditional jam made at the 1:1 fruit-to-sugar ratio, sealed into properly sterilised jars: 12 to 18 months in a cool, dark cupboard. The sugar concentration (around 65 percent) and the acid create conditions that prevent microbial growth without refrigeration. Once opened, the same jar moves to the fridge and should be used within 4 to 6 weeks.
Jam sealed with water bath canning is rated for 18 months by most food safety agencies. Jam hot-sealed without water bath processing is more variable - treat it as 6 to 12 months for pantry storage, or refrigerate for certainty.
Refrigerator Storage
Low-sugar jam (under 55 percent sugar), jam made with Pomona pectin, and small-batch jam without water bath processing should all be refrigerated. Shelf life: 3 to 4 weeks for low-sugar jam, 4 to 6 weeks for standard small-batch jam, 2 to 3 months for a sealed standard jam moved to the fridge before opening. Cold slows mould growth significantly even when the sugar concentration alone will not guarantee preservation.
Freezer Storage
Yes, you can freeze jam. It keeps well for up to 12 months in the freezer. Use freezer-safe jars or containers - standard glass canning jars can crack in the freezer if filled too close to the rim (leave 2.5cm headspace for expansion). Frozen jam thaws overnight in the fridge and is perfectly usable after thawing, though the texture may be slightly looser. Freezing is a good option for low-sugar or fresh-fruit jams that you have made in larger quantities than you will eat in a month.
Signs of Spoilage
Discard jam if you see any of the following: visible mould on the surface or inside the jar, a fermented or alcoholic smell when you open it, a bubbling or fizzing jam indicating fermentation, or a lid that was sealed and is now convex and unresponsive to pressing. Surface mould used to be treated as skimmable - current food safety guidance advises discarding the entire jar because mould in high-sugar environments can produce mycotoxins that penetrate below the visible surface.
Understanding Sugar Concentration and Safety
Jam at 65 percent sugar concentration inhibits microbial growth primarily through water activity - there is not enough available water for bacteria and most moulds to reproduce. This is the principle behind why traditional high-sugar jam keeps at room temperature for months. It is not the heat processing alone that makes it shelf-stable; it is the combination of heat processing plus the sugar concentration maintained in the finished product. Low-sugar jam disrupts this equation, which is why its storage requirements differ.
Recipe: Rhubarb and Ginger Jam
Rhubarb is naturally low in pectin and needs help setting, but its high acid content makes it safe for water bath canning and reliable for pantry storage. The ginger adds warmth that deepens over time - this jam is better at three months than at day one.
Makes: 4 to 5 x 340g jars | Prep: 20 minutes | Cook: 25 to 35 minutes
Ingredients
- 1kg rhubarb, trimmed and cut into 2cm pieces
- 900g white granulated sugar
- 3 tablespoons lemon juice
- 30g fresh ginger, peeled and finely grated
- 1 teaspoon ground ginger
Instructions
- Combine rhubarb and sugar in a large bowl. Stir well. Cover and leave for at least 2 hours (or overnight) to macerate - this draws out the juice and dissolves the sugar without cooking, preserving a brighter colour.
- Transfer the macerated rhubarb and all liquid to a heavy pan. Add lemon juice, fresh ginger, and ground ginger.
- Stir over low heat until any remaining sugar is dissolved. Bring to a rolling boil.
- Rhubarb is low in pectin - boil for 15 to 25 minutes, testing regularly from 12 minutes. The wrinkle test will show a soft but clear wrinkle when ready. If it will not set, add 1 tablespoon of liquid pectin, boil 2 more minutes, and test again.
- Ladle into sterilised jars. For pantry storage, process in a water bath for 10 minutes. For fridge storage, seal and refrigerate directly.
The Pantry Environment
A cool, dark pantry at 15 to 18 degrees Celsius is ideal. Above 21 degrees consistently, even sealed jam begins to degrade faster - colour fades, flavour diminishes, and in some cases the seal weakens. Cellars and basement storage are excellent where available. For most homes, a kitchen cupboard away from the cooker and away from direct sunlight is adequate. Avoid storing on top of the fridge - the heat cycling is particularly bad for preserves.
Jam That Has Been Opened and Refrigerated
Once opened, jam is no longer protected by the vacuum seal. Air, spoons, and ambient kitchen bacteria begin working on the exposed surface. Using a clean, dry spoon every time significantly extends shelf life after opening - a wet spoon introduces water and contamination directly into the jar. The lid should be replaced firmly after each use. Under these conditions, a high-sugar jam should be safe and flavourful for 6 weeks after opening.
Labelling
Always label with contents and date. Jam jars look identical after six months. Use masking tape and a permanent marker, or peel-off labels. Record the date made and the expected use-by date based on storage method. A jar that has been open in the fridge for 5 weeks and is unlabelled is going in the bin - a labelled jar tells you it was opened 3 weeks ago and has one week left. If you are gifting low-sugar or Pomona's jam, label it clearly with refrigerate instructions and the shelf life expectation so the recipient uses it safely.
Nutrition (per tablespoon, rhubarb ginger jam)
- Calories: approximately 48 kcal
- Carbs: 12g
- Protein: 0g
- Fat: 0g
For the full jam-making process from start to finish, see the complete homemade jam guide.
The Mould Question
Surface mould on jam used to be treated as a minor inconvenience - skim it off and carry on. Current food safety guidance has shifted on this. Mycotoxins produced by certain moulds can penetrate well below the visible surface in high-moisture or lower-sugar preserves. In traditional high-sugar jam the risk is lower because the sugar concentration limits mycotoxin mobility, but discarding any mouldy jar is the safest approach. In low-sugar jam, discard without exception. The cost of a jar of jam is not worth the alternative.
Jam vs Preserves: Different Storage Expectations
Standard jam (high sugar, standard pectin, properly sealed) has the most forgiving storage requirements. Low-sugar jam, Pomona's jam, fruit curds, and savoury jams such as tomato chilli jam all have shorter shelf lives and stricter storage requirements. Know what you made. A jar of tomato chilli jam is not shelf-stable in the same way a jar of 65-percent-sugar strawberry jam is. Treating them identically will result in mould in one case and perfectly good jam in the other. The complete homemade jam guide covers the technique decisions that determine how each finished product should be stored.
Jam as a Long-Term Pantry Investment
A well-stocked jam pantry from a summer of preserving has genuine practical value through winter. Four or five varieties of jam made at peak fruit season and stored correctly provide something ready to eat on toast, in cooking, or as a gift throughout the year. The investment in equipment (a large pan, sugar thermometer, jars) pays off across multiple batches. The time investment for a full batch of jam is 30 to 45 minutes once you have the technique. Compared to buying equivalent quality preserves, the economics are clear. More than the economics, there is something genuinely satisfying about pulling a jar of last July's strawberry jam from a shelf in January - in both directions: the practical satisfaction of having made it and the sensory one of tasting summer fruit in winter. The complete homemade jam guide covers every technique and decision from the first batch to a well-stocked shelf.
Gifting and Distribution Considerations
Giving jam as a gift is only as good as the information that goes with it. A beautifully labelled jar of strawberry jam that the recipient leaves on a sunny windowsill for four months because they did not know it should be kept in a dark cupboard is a waste of your work and their health. The label should include: the contents, the date made, the expected shelf life sealed, and instructions for once opened. For a standard high-sugar jam processed with water bath canning, this might read: "Strawberry jam, made July 2026. Best before July 2027. Once opened, refrigerate and use within 6 weeks." This information takes 30 seconds to write and removes all ambiguity. For low-sugar or refrigerator jam, add "Refrigerate immediately" prominently. The storage context for every type of jam you might make is covered alongside the technique in the complete homemade jam guide.
When Storage Rules Conflict with Convenience
The storage rules above are based on food safety best practice. In practice, many people keep opened jam for longer than 6 weeks and never have a problem, particularly with high-sugar traditional jam. The guidance is conservative and designed to account for varied home conditions - a hot kitchen, a loose lid, a shared jar with multiple users. If you have a cool kitchen, use a clean dry spoon every time, and seal the jar firmly after each use, your jam may well be fine for 8 or 10 weeks. Use your senses: smell it before using it, look for mould, taste a small amount if you are unsure. The clearest signs of a problem are smell (fermented, off, or alcoholic) and visible mould. In the absence of both, high-sugar jam is usually still good. The 4 to 6 week guideline is the conservative position; your own observation is the practical check. For the complete guide to jam-making technique from start to sealed jar, the complete homemade jam guide covers everything.
The The Home Cook's Complete Guide to Making Jam from Scratch, covers the full framework: pectin types, sugar ratios, setting point science, sterilisation methods, water bath canning, and storage shelf life by type. Each cluster guide in the series, including this one, covers a specific fruit, technique, or problem in depth with a tested recipe. Whether you are making your first single jar or working through a summer glut of stone fruit, the technique is the same: soft fruit first, sugar second, rolling boil to setting point, hot jar, sealed lid. The details within that sequence are what this series covers, article by article, so you have a reliable reference for every variation you will encounter in a season of jam-making at home.
All recipes in this series use standard kitchen equipment. None require specialist preserving pans, pressure canners, or commercial-grade ingredients. The most useful single investment for anyone making jam regularly is a digital sugar thermometer with a clip. Beyond that, a heavy-based pan, clean glass jars, and two cold saucers in the freezer are all you need to produce consistently good results.
Storage at a Glance
Sealed high-sugar jam (65 percent sugar, water bath processed): 18 months in a cool dark place. Sealed high-sugar jam (hot-jar sealed only): 6 to 12 months in a cool dark place. Once opened, any jam: fridge, 4 to 6 weeks. Low-sugar jam or Pomona's jam: fridge only, 3 to 4 weeks. Any jam: freezer, 12 months. Signs of spoilage to discard on: visible mould, fermented smell, fizzing, convex lid. Use a clean dry spoon every time, replace the lid firmly, keep in a cool place. These habits extend the useful life of any jam significantly beyond the minimum guidelines. For the complete jam-making process that determines what kind of jam you have made and therefore how it should be stored, the complete homemade jam guide covers every decision from fruit to finished jar.
Latest