How to Sterilise Jars for Jam (Oven, Dishwasher, Boiling Methods)
Properly sterilised jars are what separate shelf-stable jam from a jar of mould waiting to happen. Three reliable methods compared.
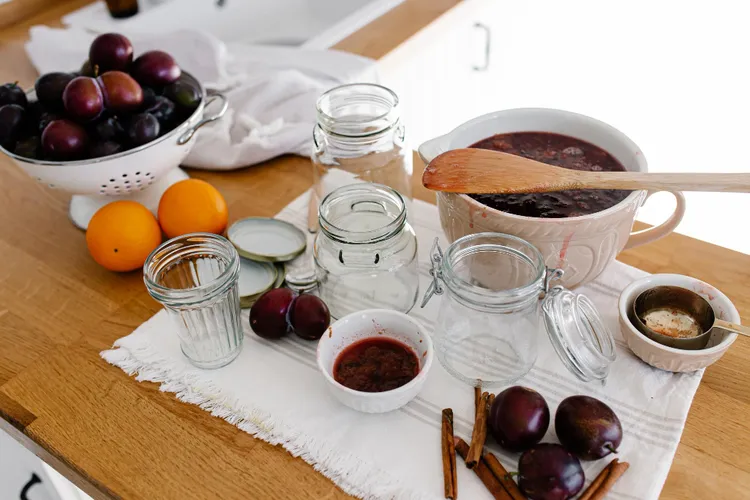
Sterilisation kills the bacteria and mould spores that survive on glass. A perfectly made jam in an inadequately sterilised jar will grow mould within days of opening - or before. The process is simple and takes less than 20 minutes with any of the three methods below.
Before You Start: Washing
All jars and lids must be washed in hot soapy water and rinsed before sterilising. Sterilisation kills microorganisms - it does not remove food residue, grease, or limescale. Use clean jars with no chips, cracks, or rust on lids. Rusty or damaged lids will not seal reliably regardless of how well you sterilise them.
Method 1: Oven (Best for Most Home Cooks)
Preheat oven to 120 degrees Celsius (fan 100 degrees). Place clean jars upright on a baking tray - not touching each other. Place lids separately on the tray. Heat for 15 minutes. Leave in the oven (turned off) until you are ready to fill them. Fill while jars are still warm. Oven sterilisation is hands-off and easy to time with your cooking. Lids can warp slightly in dry oven heat if over-cooked - 15 minutes at 120 degrees is enough.
Method 2: Dishwasher
Run jars and lids through the hottest, longest cycle. Time it to finish just as your jam reaches setting point. Remove jars immediately and fill while still hot. Do not use the heated dry cycle if your lids have rubber gaskets - the heat degrades them over time. The dishwasher method is convenient if you are already running one, but hard to time precisely. If the cycle finished 20 minutes ago, the jars have cooled and may not be as effective.
Method 3: Boiling Water
Submerge jars completely in a large pan of cold water. Bring to a boil and maintain for 10 minutes. Lift out with tongs and allow to drain upside down on a clean towel. Fill while still warm. Boil lids separately for 5 minutes. This method needs no oven and provides definitive sterilisation, but it takes more time and effort and jars can be hot and slippery to handle.
Recipe: Raspberry and Red Currant Jam (Tests the Seal)
Red currants are very high in pectin and acid. Combined with raspberries, they set firmly and reliably - a good recipe for practising your jar sterilisation and seal-checking technique because the jam itself is forgiving.
Makes: 4 x 340g jars | Prep: 15 minutes | Cook: 20 to 25 minutes
Ingredients
- 600g fresh raspberries
- 400g red currants, stripped from stalks
- 900g white granulated sugar
- 2 tablespoons lemon juice
Instructions
- Sterilise 4 jars using your chosen method. Put two saucers in the freezer.
- Combine raspberries, red currants, and lemon juice in a large heavy pan. Cook over medium heat for 8 to 10 minutes, stirring and mashing, until fruit is soft and very juicy.
- Add sugar, stir over low heat until dissolved completely.
- Bring to a rolling boil. Boil for 8 to 12 minutes. The red currant pectin means this sets quickly - test from 7 minutes. The wrinkle should be firm and clear.
- Ladle into warm sterilised jars. Wipe rims. Screw lids on firmly. As jars cool (15 to 30 minutes), watch the lids - a properly sealed jar will produce a quiet popping sound as the lid dimples inward.
Checking Your Seal
Once cool, press the centre of each lid. A sealed lid is concave (curves inward) and does not flex when pressed. An unsealed lid is flat or convex and clicks when pressed. Any unsealed jars go in the fridge and should be used within 3 to 4 weeks. Do not force-seal them by pressing the lid down - that is not how it works.
Why Sterilisation Fails Despite Following Instructions
The most common failure is contamination between sterilising and filling. A sterilised jar left to cool completely on a non-sterile surface, touched on the inside rim, or filled with a non-sterile ladle is no longer reliably sterile. Work efficiently: sterilise, fill immediately, seal immediately. The hot jam itself creates a hostile environment for most microorganisms, but the chain from hot jar to sealed jar needs to be unbroken.
Lids: The Overlooked Variable
Two-piece canning lids (flat lid plus screw band) should use new flat lids each time. The sealing compound on a lid that has been processed once is deformed to the shape of the previous jar and will not create a reliable seal on a new jar. Screw bands can be reused indefinitely if they are not bent or rusting. Single-piece lids from commercial jars can be reused once for homemade jam if undamaged and previously unsealed, but they do not give the same reliability as purpose-made canning lids.
Reusing Commercial Jars
Commercial jam jars can be reused for homemade jam. They sterilise well using any of the three methods. The flat lid from a commercial jar is single-use - it cannot be relied upon to seal a second time after being opened. If you are reusing commercial jars, either use a purpose-made canning lid in the matching size, or accept that you are making a refrigerator product that will be eaten quickly rather than a long-term shelf-stable preserve.
Batch Organisation
When sterilising multiple jars for a large jam session, stagger the oven method by putting jars in as you start cooking the jam, so they are hot and ready when the jam reaches setting point. Fill and seal in quick succession - jam held in a pan off the heat starts to set in the pan, especially high-pectin varieties like blackcurrant and gooseberry. Speed matters more at this stage than at any other point in the process.
Why Jars Sometimes Do Not Seal
The most common causes of seal failure: jam residue on the rim (always wipe before sealing), jars that were too cool when filled, lids that were overtightened and could not flex to create a vacuum, or damaged lid seals. Always inspect lids before use - the sealing compound should be intact with no gaps or tears.
Nutrition (per tablespoon, raspberry red currant jam)
- Calories: approximately 52 kcal
- Carbs: 13g
- Protein: 0g
- Fat: 0g
For complete jam-making technique from fruit selection through storage, see the complete homemade jam guide.
Storing Sterilised Jars Before Use
Sterilised jars that you are not filling immediately should be stored upside down on a clean towel. This prevents airborne bacteria and dust from settling inside the jar. They will stay adequately sterile for a few hours this way. If you sterilised jars the day before and left them right-way up in a kitchen where cooking was happening, re-sterilise them. Five minutes in a 120-degree oven is enough for a warm refresh. This is not a necessary step if you are filling immediately from the oven, but it takes no time and removes doubt.
Glass Quality and Safety
Not all glass is equal. Jam jars designed for home preserving are made from heat-resistant glass. Recycled commercial jars (pasta sauce, pickle jars, supermarket jam jars) vary in quality but most are fine for one or two reuses if undamaged. The risk point is hairline cracks or chips - run your finger around the rim of every jar before sterilising. A crack invisible to the eye can become a shard when hot jam hits it. Reject any jar with any chip, no matter how small. For everything connected to jam technique, the complete homemade jam guide covers the full process from fruit to sealed jar.
Sterilisation for Gifted Jam
If you are making jam to give away, sterilisation is not optional. The recipient may not refrigerate it immediately, may store it in a warm kitchen, and has no way of knowing how it was made or whether a jar that sealed imperfectly on cooling is actually safe. The oven method for 15 minutes plus a water bath process for 10 minutes gives you a product you can gift with full confidence - sealed jars processed correctly will keep at room temperature for 12 months. Jam made with only hot-jar sealing (no water bath) is better given with the instruction to refrigerate and use within three months. Being clear about this is not an admission that something went wrong - it is accurate information about a product made with a different technique. For the complete jam-making process from start to finish, see the complete homemade jam guide.
Equipment Care and Maintenance
Jars last for many years if stored carefully. Avoid stacking them inside each other, which causes chips. Store in a cool, dry cupboard away from direct light. Check for chips, cracks, and rust on lids before each use - these develop during storage, not just during use. Old lids with degraded sealing compound should be discarded - the compound is visible as a rubber ring around the inner edge of the lid, and it should be intact and slightly tacky, not cracked or hard.
The best long-term investment in jam-making equipment is a set of proper canning jars with two-piece lids. They are designed specifically for the heat differentials involved, the flat lids are replaceable without buying new jars, and the screw bands are indefinitely reusable. A set of 12 jars with two dozen flat lids costs the equivalent of 4 to 5 jars of good quality shop jam and will last for years. For the complete jam technique that these jars are part of, the complete homemade jam guide covers everything from fruit selection to finished jar.
Lid Types and Their Implications
Two-piece canning lids (separate flat lid and screw band) are the most reliable option. The flat lid creates the seal; the screw band holds it in place during processing and storage. After processing, many canners remove the screw bands for storage - this makes seal failure immediately visible (a failed seal will have a lid that is no longer concave without the band holding it). Twist-off lids (single piece, common on commercial jam jars) can be used for homemade jam but are less reliable for water bath processing because the sealing mechanism is different. For simple hot-jar sealing without water bath processing, twist-off lids from commercial jars work fine for short-term refrigerator storage. For shelf-stable long-term storage, two-piece canning lids with new flat seals every time is the reliable choice.
Quick Reference Summary
This article is one of 12 guides in the CookThisMuch homemade jam series. The article The Home Cook's Complete Guide to Making Jam from Scratch, covers the full framework: pectin types, sugar ratios, setting point science, sterilisation methods, water bath canning, and storage shelf life by type. Each cluster guide in the series, including this one, covers a specific fruit, technique, or problem in depth with a tested recipe. Whether you are making your first single jar or working through a summer glut of stone fruit, the technique is the same: soft fruit first, sugar second, rolling boil to setting point, hot jar, sealed lid. The details within that sequence are what this series covers, article by article, so you have a reliable reference for every variation you will encounter in a season of jam-making at home.
All recipes in this series use standard kitchen equipment. None require specialist preserving pans, pressure canners, or commercial-grade ingredients. The most useful single investment for anyone making jam regularly is a digital sugar thermometer with a clip. Beyond that, a heavy-based pan, clean glass jars, and two cold saucers in the freezer are all you need to produce consistently good results.
Sterilisation: The Bottom Line
Choose one method, do it correctly, and fill jars while hot. Oven at 120 degrees for 15 minutes is the most reliable for home cooks. Dishwasher on the hottest cycle works if timed well. Boiling water for 10 minutes works without an oven. The method matters less than the execution. A jar sterilised correctly with any of these methods is equally safe. A jar that was sterilised but then left to cool on a contaminated surface, or touched on the inside, or filled with a non-sterile ladle, is no longer reliable regardless of the method used. Keep the chain clean from hot oven to hot jam to sealed lid. That is the entire principle.
Latest