Starting Tomatoes From Seed (Varieties, Germination, Timing)
How to choose between heirloom and hybrid, determinate and indeterminate varieties, and the germination timing and light requirements that determine whether seedlings thrive.
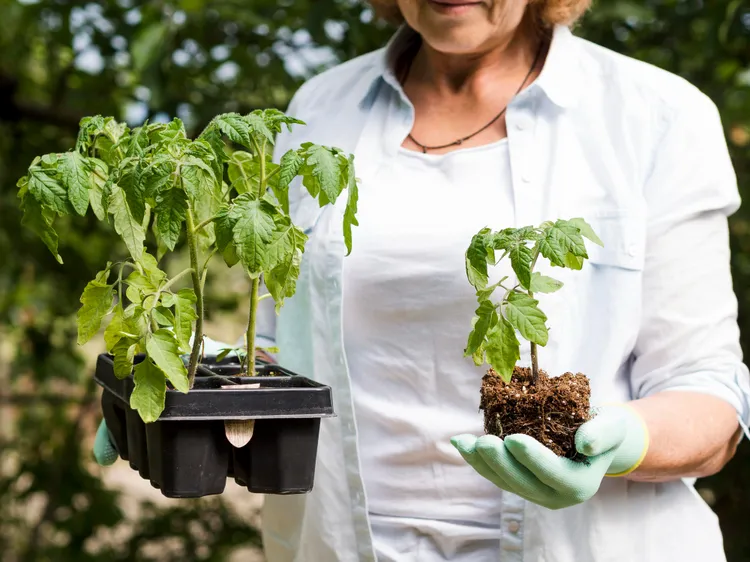
Tomato seeds germinate reliably enough that most of what determines success or failure happens before the seed ever hits soil: variety choice and timing. Get those two decisions right and the actual sprouting takes care of itself in five to ten days.
Heirloom vs. Hybrid: What Actually Matters
Heirloom tomatoes are open-pollinated varieties that breed true from saved seed, generation after generation, which is why the same Brandywine or Cherokee Purple seed has been passed down for decades. Hybrid varieties are deliberately crossed for specific traits, usually disease resistance, uniform ripening, or higher yield, and they don't breed true if you save their seed.
Neither category is objectively better. Heirlooms tend to win on flavor complexity and are worth growing if you're cooking with what you harvest rather than shipping it. Hybrids tend to win on reliability, disease resistance, and consistent yield, which matters more in a short growing season or a garden with a known disease history (early blight, fusarium wilt) in the soil. A reasonable approach for a first garden: grow two or three reliable hybrids for volume and one or two heirlooms for flavor and interest.
Determinate vs. Indeterminate
This distinction matters more than most seed packets make clear. Determinate varieties grow to a fixed size, set fruit over a relatively narrow window, and then stop, which makes them well suited to canning and preserving since you get a large harvest concentrated in a few weeks. Indeterminate varieties keep growing and producing until frost kills them, giving you a steady trickle of fruit over months rather than one big batch.
If the goal is a steady supply of fresh tomatoes for eating, indeterminate varieties make more sense. If the goal is a big batch for sauce or canning, determinate varieties concentrate the work into a shorter, more manageable window.
When to Start Seeds Indoors
Tomatoes need six to eight weeks of indoor growth before they're ready to transplant outside, and transplanting happens after your last expected frost date, once nighttime temperatures reliably stay above 50°F (10°C). Count backward from your last frost date to find your start date. Starting significantly earlier than this doesn't give you a head start; it gives you leggy, stressed plants that stall out waiting for conditions to catch up.
Local frost dates vary by hundreds of miles even within the same country, so a seed packet's generic "start 6-8 weeks before last frost" instruction only works once you know your own date. Regional extension office websites are the most reliable source for this, more reliable than general online frost maps.
Germination Conditions
Tomato seeds germinate best at a consistent soil temperature between 70°F and 85°F (21°C to 29°C). Below 60°F (16°C), germination slows dramatically or stalls entirely. A seedling heat mat placed under trays makes a bigger difference than almost any other single input at this stage, especially if you're starting seeds in a cool basement or garage.
- Plant seeds about 1/4 inch (6mm) deep in a seed-starting mix, not garden soil, which tends to be too dense and can carry disease.
- Keep the mix consistently moist but not waterlogged. A humidity dome or loosely placed plastic wrap over the tray helps retain moisture until germination.
- Expect sprouts in 5 to 10 days under good conditions. Remove any humidity dome as soon as the first sprouts appear to prevent damping-off, a fungal condition that kills seedlings at the soil line.
Light Requirements After Germination
This is where most home seed-starting goes wrong. A sunny windowsill is not enough light for tomato seedlings, and the result is the classic leggy, pale, weak-stemmed seedling that flops over. Seedlings need 14 to 16 hours of strong light daily, which in practice means a grow light positioned two to three inches above the top of the plants, raised as they grow. Without supplemental light, expect noticeably weaker plants even if they technically survive.
Hardening Off Before Transplanting
Seedlings raised entirely indoors haven't been exposed to wind, direct sun intensity, or temperature swings, and moving them straight from a windowsill to the garden shocks them badly enough to stunt growth for weeks. Hardening off means gradually introducing outdoor conditions over 7 to 10 days: a few hours in a shaded, wind-protected spot the first day, building up to a full day and eventually an overnight outdoors by the end of the period.
Skipping this step is one of the most common reasons transplants that looked healthy indoors struggle or die within days of going into the ground.
Common Seed-Starting Mistakes
- Starting too early: Plants outgrow their pots before it's safe to transplant, leading to root-bound, stressed seedlings.
- Overwatering: Seed-starting mix that stays soggy invites damping-off and root rot before seedlings even get established.
- Insufficient light: The single most common cause of weak, leggy seedlings that never fully recover.
- Skipping hardening off: Sends healthy-looking seedlings into transplant shock they didn't need to experience.
Reading a Seed Packet Correctly
Seed packets list "days to maturity," a number that refers to the time from transplanting into the garden to first ripe fruit, not from seed to fruit. A packet listing "70 days" means roughly 70 days after the seedling goes into the ground, on top of the 6 to 8 weeks already spent growing indoors first. Confusing these two numbers is a common reason gardeners misjudge when their first tomato will actually be ready.
Packets also list disease resistance codes, commonly letters like V, F, N, T, or A following the variety name. These indicate resistance to specific diseases: Verticillium wilt, Fusarium wilt, nematodes, tobacco mosaic virus, and Alternaria, respectively. If your garden has a known history of any of these issues, prioritizing resistant varieties meaningfully reduces risk compared to starting from scratch with an unknown track record.
Seed Starting Containers
Almost any small container with drainage holes works for the first few weeks: purpose-built seed trays, repurposed yogurt cups, or biodegradable peat pots that can go directly into the ground later, reducing transplant shock since roots aren't disturbed. Whatever the container, avoid starting seeds directly in anything too large; a seedling in an oversized container often ends up sitting in soil that stays wet longer than the small root system can use, increasing damping-off risk.
Most seedlings need to move up to a larger pot (commonly called "potting up") once they develop their first true leaves and outgrow the initial small starting cell, typically 2 to 3 weeks after germination. This intermediate step, while not strictly required, tends to produce sturdier, less root-bound plants by transplant time than leaving seedlings in their original small cell for the full 6 to 8 weeks.
Saving Seed From Your Own Tomatoes
If you're growing an open-pollinated heirloom variety, saving seed for next season is straightforward and free. Scoop seeds and surrounding gel from a fully ripe tomato into a small container, add a little water, and let the mixture ferment at room temperature for 2 to 3 days. This fermentation step isn't optional for reliable results: it breaks down the gel coating around each seed that would otherwise inhibit germination, and it also helps eliminate some seed-borne diseases. Skim off the mold that forms on the surface, rinse the viable seeds (which sink) in a strainer, and dry them fully on a paper towel or coffee filter before storing in a labeled envelope somewhere cool and dry.
Seed saved this way from a hybrid variety will not grow true to the parent plant; hybrids are a cross between two different parent varieties, and their seed reverts unpredictably toward one parent or the other. Seed saving only makes sense for heirloom or other open-pollinated varieties.
Troubleshooting Poor Germination
- No sprouts after 2 weeks: Soil temperature is likely too cold. Check with a soil thermometer; below 60°F (16°C) germination can stall indefinitely rather than just slowing down.
- Sprouts appear but then collapse at the soil line: Classic damping-off, a fungal issue caused by excess moisture and poor airflow. Reduce watering, remove any humidity dome, and consider a small fan for gentle air circulation.
- Very uneven germination within the same tray: Often a seed age or storage issue rather than a technique problem; tomato seed viability drops gradually after about 4 years even in good storage conditions.
Once seedlings are established and growing steadily, the next real decision point is transplanting outdoors, covered fully in our growing guide.
Once seedlings are hardened off and ready for the ground, the next phase is where staking, watering, and fertilizing decisions start to matter. See our growing guide for what comes next, or head back to the complete Tomatoes: Seed to Plate guide for the full lifecycle.
Choosing Between Direct Sowing and Indoor Starting
In climates with a long, warm growing season, direct sowing tomato seed straight into the garden after the soil has warmed is technically possible and skips the entire indoor-starting process. In practice, this only works reliably in regions with roughly 100 or more frost-free days remaining after the soil warms enough for germination, since direct-sown seedlings need the same 8 to 12 weeks to reach fruiting maturity as transplants, just starting from a later calendar date. Most home gardeners outside of very warm climates get meaningfully more of the growing season by starting seed indoors ahead of the last frost, rather than waiting for outdoor conditions to be suitable for direct sowing.
A Simple Seed-Starting Checklist
- Confirm your last frost date and count back 6 to 8 weeks to find your start date.
- Use fresh seed-starting mix, not garden soil, in small containers with drainage.
- Keep soil temperature between 70°F and 85°F (21°C to 29°C) until germination.
- Provide 14 to 16 hours of strong light daily once sprouts appear.
- Pot up once true leaves appear, typically 2 to 3 weeks in.
- Harden off over 7 to 10 days before transplanting outdoors.
Frequently Asked Questions
Can I start tomato seeds without a grow light? You can, but expect weaker, leggier seedlings than with supplemental light. If a grow light isn't an option, the brightest available south-facing window combined with rotating the tray daily to prevent one-sided growth is the best fallback, though results will still lag behind properly lit seedlings.
How many seeds should I start per variety? Starting 2 to 3 seeds per cell or pot and thinning to the strongest single seedling after germination is a common approach, hedging against seeds that fail to germinate without ending up with more seedlings than you have room to grow on.
Can I use garden soil instead of seed-starting mix? It's not recommended. Garden soil is typically too dense for a small container, drains poorly at that scale, and can carry soil-borne diseases or pests that a sterile seed-starting mix avoids entirely.
How do I know when seedlings are ready to transplant? Beyond the calendar timing (6 to 8 weeks of growth, after the last frost date has passed), look for sturdy stems, at least two sets of true leaves beyond the initial seed leaves, and successful completion of the hardening-off process.
What Success Actually Looks Like at This Stage
By the end of the seed-starting phase, success isn't a perfect-looking seedling in every cell; it's a reasonable number of sturdy, properly hardened seedlings ready to go into the ground on schedule. A few failed seeds or a couple of weaker seedlings culled along the way is normal, not a sign anything went wrong. Starting a few more seeds than you plan to actually grow to maturity builds in exactly this kind of margin.
Thinking Ahead to the Rest of the Season
Decisions made at the seed-starting stage echo forward through every later stage in this guide. A variety chosen for disease resistance affects how much intervention growing requires later. A determinate variety chosen for a concentrated harvest affects how much preservation work shows up in late summer. Thinking briefly about the whole arc, not just germinating a seed, pays off well before the first transplant ever goes into the ground.
Patience
Seed starting is the stage most likely to test a gardener's patience, since the visible reward, actual fruit, is still months away. Trusting the timeline rather than second-guessing it with early transplanting or excessive fussing over seedlings tends to produce better results than intervening more than the process actually requires.
Latest