Water Bath Canning for Jam: A Beginner's Step-by-Step
Water bath canning creates a vacuum seal for long-term pantry storage. Here is exactly how to do it, including processing times and altitude adjustments.
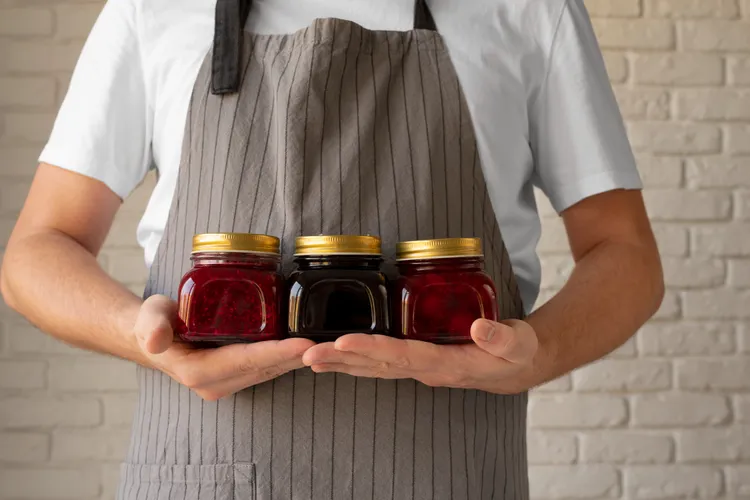
Most homemade jam sealed in hot jars will create a partial vacuum as it cools - enough for short-term pantry storage of a few months. Water bath canning creates a full, tested vacuum seal that is reliable for 12 to 18 months. If you are making jam in quantity or want to be confident about storage, it is worth learning. The process adds about 15 minutes to your jam-making session.
What Water Bath Canning Does
Submerging sealed jars in boiling water and processing them for a set time kills any remaining microorganisms in the headspace and creates a strong vacuum seal as the jars cool. This is different from just pouring hot jam into hot jars and hoping they seal - that method works for high-sugar jam in the short term but is not an approved preservation method for longer storage.
Water bath canning is safe for high-acid foods: jams, jellies, pickles, and most fruit preserves. It is not safe for low-acid foods like vegetables, meat, or stock - those require a pressure canner, which is a different piece of equipment entirely.
Equipment
- Canning pot or large stockpot - must be deep enough to submerge jars with at least 2.5cm water above the lids
- Rack or folded tea towel - to keep jars off the bottom of the pot (direct heat can crack glass)
- Jar lifter or tongs - essential for safely removing hot jars
- Standard canning jars with two-piece lids - use brand new flat lids each time, never reuse flat lids
Recipe: Classic Apricot Conserve
Apricot jam is ideal for a first canning session - it is naturally well-suited to the technique and the warm amber colour makes checking jar seals easy.
Makes: 5 x 250ml jars | Prep: 20 minutes | Cook plus Process: 50 minutes
Ingredients
- 1.2kg fresh apricots, halved and stoned
- 900g white granulated sugar
- 4 tablespoons lemon juice
- 100ml water
Instructions
- Set up the canning pot. Fill a large stockpot with enough water to cover jars by 2.5cm. Place a rack or folded cloth on the bottom. Begin heating - it takes time to come to a boil.
- Sterilise jars. Wash jars and two-piece lids in hot soapy water. Place jars in the canning pot (they can warm in the simmering water while you make the jam - remove just before filling). Keep lids in a bowl of hot water.
- Make the jam. Combine apricots, water, and lemon juice in a heavy pan. Simmer for 15 minutes until very soft. Add sugar, stir to dissolve. Bring to a rolling boil and cook until setting point is reached, approximately 15 to 20 minutes.
- Fill the jars. Remove a jar from the canning pot using tongs. Set on a towel. Ladle jam in, leaving exactly 6mm headspace at the top - this is important for a proper seal. Wipe rim with a damp cloth. Centre a new flat lid on the jar. Screw the band on fingertip-tight only - do not overtighten.
- Process the jars. Lower filled jars into the boiling canning pot using the jar lifter. Water should cover by at least 2.5cm. Bring back to a full boil. Process for 10 minutes for 250ml or 340g jars. Adjust for altitude if needed.
- Remove and cool. Lift jars straight up without tilting and place on a towel, leaving 2.5cm space between them. Do not tilt, move, or press lids while cooling. Leave undisturbed for 12 to 24 hours.
- Check seals. Press the centre of each lid. Sealed lids are concave and do not flex. Any unsealed jars refrigerate immediately and use within 4 weeks.
Processing Times by Jar Size at Sea Level
- 125ml (half-cup) jars: 10 minutes
- 250ml (half-pint) jars: 10 minutes
- 500ml (pint) jars: 10 minutes
Altitude Adjustment
Water boils at a lower temperature at altitude, reducing the effectiveness of processing. Add time based on elevation: 300 to 900 metres above sea level add 5 minutes; 900 to 1,800 metres add 10 minutes; above 1,800 metres add 15 minutes.
Headspace: Why It Matters
The 6mm headspace specified for jam is calibrated. Too much headspace (more than 12mm) and there is too much air in the jar - the vacuum created during processing may be insufficient. Too little headspace (under 3mm) and expanding jam during processing can push out through the lid seal. Most canning failures attributed to bad luck are actually headspace errors. Use a ruler or the measurement markings on a canning funnel to be precise.
What Happens Inside the Jar During Processing
When sealed jars are submerged in boiling water, the heat drives air from the headspace and creates pressure inside the jar. As jars cool after removal, the internal pressure drops and the lid seals under vacuum. The popping sound heard during cooling (often 15 to 30 minutes after removal from the canner) is the lid snapping down under the vacuum. Multiple pops from one jar during cooling is normal - it is the process completing as different sections of the lid respond to the cooling temperature.
The Safety Case for Water Bath Canning
Water bath canning is approved and tested by food safety authorities in multiple countries specifically because high-acid foods processed in this way have a documented safety record going back decades. The processing time recommendations have been tested in laboratory conditions to confirm they eliminate pathogenic organisms in sealed jars at sea level. Following tested recipes and processing times is what makes the method reliable - improvising processing times or changing the acid content is where risk enters.
When to Use Water Bath Canning vs Refrigerator Storage
If you are making jam primarily for immediate household use and will work through it within a month, refrigerator storage is simpler and produces a fresher-tasting product. Water bath canning is worth the additional effort when you are making large batches for gifting or long-term storage, or when you want guaranteed shelf stability without refrigeration. For the smaller volumes suited to refrigerator storage, the small-batch jam guide covers a streamlined approach with no canning required.
Nutrition (per tablespoon, apricot conserve)
- Calories: approximately 50 kcal
- Carbs: 13g
- Protein: 0g
- Fat: 0g
For everything leading up to this step - pectin, sugar ratios, and setting point - see the complete homemade jam guide.
Storing and Rotating Canned Jam
Store water-bath canned jam in a cool, dark location. Temperature fluctuation shortens shelf life even in properly sealed jars - avoid storing above radiators, beside ovens, or in direct sunlight. Date every jar at the time of canning and use the oldest first. A simple first-in-first-out rotation means nothing gets forgotten at the back of a shelf for three years. Inspect jars before opening - any jar with a bulging lid, unusual odour, or spurting liquid when opened should be discarded without tasting. These signs indicate fermentation or spoilage that occurred inside the sealed jar and the contents are not safe. For storage guidance beyond canning, see the homemade jam storage guide.
What Water Bath Canning Cannot Do
Water bath canning is not a universal preservation method. It only works for high-acid foods - jam, jelly, pickles, tomatoes (with added acid), and most fruit preserves. Low-acid foods including vegetables, meat, fish, and stock require a pressure canner that reaches temperatures above the boiling point of water. Using a water bath for low-acid foods is not a safe substitute and has caused serious illness historically. If you are interested in preserving vegetables from a garden or making stocks for long-term storage, a pressure canner is a separate investment and a separate technique. For jam, the water bath method is appropriate, tested, and safe when followed correctly. For everything else in the jam-making process - technique, pectin, and storage - the complete homemade jam guide covers the full picture.
Water Bath Canning: Common Mistakes
Overfilling jars is one of the most common errors. Too little headspace means the expanding jam during processing pushes out through the lid and leaves residue that prevents a clean seal. Always leave exactly 6mm. Under-filling leaves too much air, which requires more heat to exhaust, and the resulting vacuum may be insufficient for long-term storage.
Starting the processing timer before the water returns to a full boil is another common mistake. The time counts from when the water is at a full rolling boil with the jars inside. If you lower the jars and the water drops to a simmer, wait for the full boil to return before starting the clock. On a domestic hob this can take 3 to 5 minutes depending on the pan size and the number of jars. For context on what makes jam safe at the composition level - sugar, acid, and pectin - as well as technique for every stage of the process, the complete homemade jam guide covers the full picture.
Record-Keeping for Canned Jam
Keeping a simple record of each water bath canning session takes 2 minutes and pays off repeatedly. Note the date, the fruit, the recipe, the number of jars, the processing time, how many jars sealed successfully, and any observations. After several sessions you will have a personal reference covering your hob, your pot, your jars, and your altitudes. This record also matters for food safety - if you ever have reason to doubt whether a batch was processed correctly (you lost track of time, the temperature seemed low, you are not sure the water was fully boiling), the record tells you. Labels on jars cross-referenced with the session record give you complete traceability. For the technique that precedes canning - making the jam itself - the complete homemade jam guide covers the full process.
Quick Reference Summary
This article is one of 12 guides in the CookThisMuch homemade jam series. The pillar article, The Home Cook's Complete Guide to Making Jam from Scratch, covers the full framework: pectin types, sugar ratios, setting point science, sterilisation methods, water bath canning, and storage shelf life by type. Each cluster guide in the series, including this one, covers a specific fruit, technique, or problem in depth with a tested recipe. Whether you are making your first single jar or working through a summer glut of stone fruit, the technique is the same: soft fruit first, sugar second, rolling boil to setting point, hot jar, sealed lid. The details within that sequence are what this series covers, article by article, so you have a reliable reference for every variation you will encounter in a season of jam-making at home.
All recipes in this series use standard kitchen equipment. None require specialist preserving pans, pressure canners, or commercial-grade ingredients. The most useful single investment for anyone making jam regularly is a digital sugar thermometer with a clip. Beyond that, a heavy-based pan, clean glass jars, and two cold saucers in the freezer are all you need to produce consistently good results.
Water Bath Canning: The Short Version
Hot jam into hot sterilised jars, 6mm headspace, fingertip-tight lids, submerge in boiling water to cover by 2.5cm, process 10 minutes from full boil, lift without tilting, leave 24 hours, check seals. That is the process. The detail in this guide exists because each of those steps has a reason and a failure mode, and understanding both makes you more reliable than following the steps mechanically. But if you follow those steps correctly, with new flat lids on every jar, water at a full rolling boil before starting the timer, and jars undisturbed for the full 24-hour cooling period, the process works. For the jam itself - the technique, the pectin, and the setting point - the complete homemade jam guide is where to start.
Building a Water Bath Canning Setup
You do not need purpose-built canning equipment to water bath process jam. A large stockpot (at least 30cm tall), a folded tea towel on the base, standard tongs, and proper canning jars with two-piece lids is a complete setup. The purpose-built equipment (canning pots with racks, jar lifters) is useful if you process more than a dozen jars per session, but it is not required to start. Total outlay for a basic setup that will last for years is the cost of a box of canning jars and their lids. Everything else is standard kitchen equipment. If you get to a point where you are processing 20 or more jars at a time, the dedicated rack and jar lifter save meaningful time and reduce the risk of dropping a hot jar. Until then, the improvised setup is adequate. For the jam technique that precedes canning, the complete homemade jam guide covers the full method from fruit to finished jar.
Latest