How to Make Your Own Vinegar at Home: A Beginner's Fermentation Guide
Making vinegar at home requires a mother of vinegar, an alcohol source, and 4 to 8 weeks of patience. The result is genuinely better than most commercial options and gives you complete control over flavor. Here's the full process, from equipment to troubleshooting.
Home vinegar production is one of the most rewarding fermentation projects because the variables are few, the failure modes are easy to identify, and the result - a raw, complex, living vinegar - is meaningfully better than almost anything available at a standard grocery store. Commercial vinegar is pasteurized, filtered, and standardized for consistent acidity. Homemade vinegar retains the character of the original liquid, develops through actual fermentation rather than industrial processing, and can be adjusted to exactly the flavor and acidity level you want. Apple scrap vinegar is the best starting project: near-zero cost, high success rate, and an excellent result that outperforms commercial ACV.
The Science in Brief
Vinegar fermentation happens in two stages. In the first stage, yeast converts sugars in a fruit juice or grain liquid into alcohol - standard alcoholic fermentation. In the second stage, Acetobacter bacteria convert that alcohol into acetic acid (vinegar). The Acetobacter form a visible biofilm on the surface of the liquid called the "mother of vinegar" - a rubbery, pale-colored mat that is the active fermentation zone.
Critical constraint: Acetobacter is aerobic. It needs oxygen to work. This is the key distinction between vinegar fermentation and most other fermentations (beer, wine, sauerkraut) that proceed in the absence of oxygen. Your container must allow airflow to the surface of the liquid while keeping insects out. A cloth cover over the opening is the standard solution: breathable but physically protective.
The alcohol level of the starting liquid matters. Acetobacter works best at 5% to 10% ABV. Wine at 12% to 14% should be diluted with water to bring it down. Beer at 4% to 6% is usually at the right level. Spirits or anything over 10% need significant dilution.
Equipment
- A wide-mouth glass jar or ceramic crock, at least 1 liter: Wide mouth equals more surface area for oxygen exposure and faster fermentation. Do not use metal - acetic acid reacts with most metals.
- Breathable cloth cover: Cheesecloth, muslin, or a clean cotton cloth. Secured with a rubber band or string. Allows gas exchange and oxygen in, while keeping out fruit flies and dust.
- Kitchen scale: For measuring the sugar addition in Stage 1.
- pH strips or a digital pH meter: Not essential but very useful for knowing when fermentation is complete. A completed 5% acetic acid vinegar should reach pH 2.8 to 3.0.
- Fine-mesh sieve and cheesecloth for straining.
Getting a Mother of Vinegar
Three practical options: buy a live mother of vinegar online (typically $5 to $10 for a starter), use the cloudy sediment from a bottle of raw unfiltered apple cider vinegar (any bottle that says "with the mother" and has visible strands), or let the fermentation proceed wild - leaving the alcoholic liquid exposed to air and relying on environmental Acetobacter to colonize the surface. The first two options are faster and more reliable. Wild fermentation works but takes longer and the results are less predictable.
Apple Scrap Vinegar: The Best First Project
Stage 1: Making the Alcoholic Base
Timeline: 1 to 2 weeks.
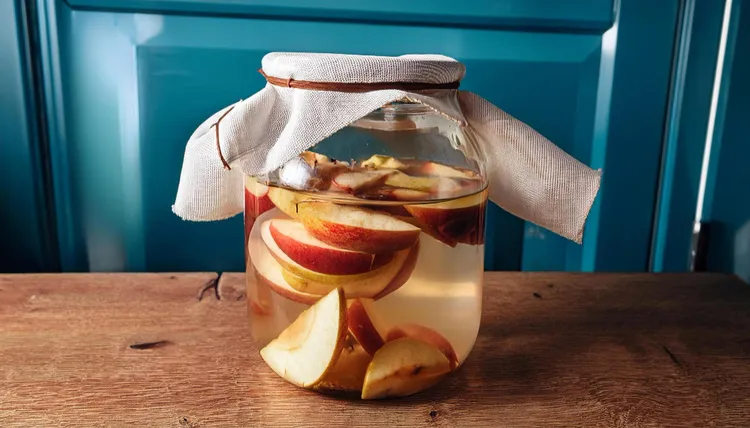
- Collect apple scraps - cores, peels, leftover fruit. About 400 to 500g is enough for a 1-liter batch. Rinse but don't sanitize: the wild yeast on the skins drives Stage 1 fermentation.
- Pack the apple scraps loosely into your jar. Add 600ml of unchlorinated water (filtered tap water or water left to sit overnight) and 2 tbsp of sugar. Stir to dissolve. The sugar supplements whatever sugar remains in the scraps.
- Cover loosely with cloth (not sealed) and leave at room temperature, 18°C to 24°C. Stir daily. Within 3 to 5 days you should see consistent bubbling - CO2 from yeast fermentation. The mixture will smell faintly alcoholic and slightly fruity.
- After 10 to 14 days, strain out the solids, pressing firmly to extract all liquid. The strained liquid should have a clearly alcoholic smell and a mild apple-yeasty character. This is your "apple wine" - the base for Stage 2.
Stage 2: Acetification
Timeline: 4 to 8 weeks.
- Pour the strained alcoholic liquid back into a clean wide-mouth jar. Add your mother of vinegar, or just leave it - if wild fermentation was strong in Stage 1, wild Acetobacter may already be present.
- Cover with cloth. Store in a warm spot (18°C to 25°C is ideal) with indirect light. Direct strong sunlight can inhibit fermentation.
- Do not seal the jar tightly at any point in Stage 2. Acetobacter needs continuous oxygen. Sealing stops vinegar fermentation immediately.
- Over the first 1 to 2 weeks, a thin rubbery film will form on the surface - this is the mother. Don't disturb it. It's the active fermentation zone and moving it can slow things significantly.
- Taste the liquid at 4 weeks. It should be clearly acidic with a clean vinegar sharpness, and the alcoholic character should have largely disappeared. If it still tastes primarily alcoholic, give it another 2 to 3 weeks and taste again.
- At full acidity (pH 2.8 to 3.0, or by taste - the vinegar should be pleasantly sharp and clean, not mild), the vinegar is done.
Finishing
Strain the finished vinegar through fine cheesecloth. For a cleaner, more shelf-stable product, pasteurize: heat gently to 65°C (150°F) and hold for 10 minutes, then cool and bottle in clean glass. This kills the Acetobacter and stops fermentation, locking in the current flavor and acidity. For a living, raw vinegar with more complexity and the option to use the mother again, skip pasteurization and refrigerate - cold significantly slows fermentation. Either way, bottle in glass with a tight-fitting seal.
Wine Vinegar
The process is identical to apple scrap vinegar except you skip Stage 1 - the wine is already alcoholic. Dilute wine over 10% ABV with water: a 12% wine mixed with an equal volume of water gives you 6% ABV. Add the mother and proceed to Stage 2. Six to ten weeks produces an excellent result. The character of the original wine comes through clearly - a fruity, tannic Cabernet produces a full-bodied red wine vinegar; a light Pinot Grigio produces a delicate white wine vinegar. This is the best use for leftover wine that's gone slightly off - it's already started toward vinegar and the quality of the starting material still matters to the final result.
Other Starting Bases
- Beer vinegar: Uses the same Stage 2 process with beer as the base. Most beers are already at 4% to 6% ABV and don't need dilution. Malt character carries through beautifully.
- Fruit wine vinegars: Pear, plum, berry - any fruit fermented to a light wine first, then acetified. Each fruit produces a distinctly different vinegar character.
- Rice vinegar: Requires making rice wine in Stage 1, which involves a rice koji starter - more complex than fruit fermentation. Worth attempting after completing a simpler project first.
Troubleshooting
- No activity after 2 weeks in Stage 1: Temperature probably too low (below 16°C) or not enough wild yeast. Add a small amount of bread yeast (1/4 tsp) to restart fermentation, or move to a warmer location.
- No mother forming in Stage 2: May not have active Acetobacter. Add a tablespoon of raw unfiltered ACV to introduce the bacteria. Ensure the cloth cover allows adequate airflow.
- Smells like nail polish remover (ethyl acetate): A sign of too-high alcohol concentration (over 10%) or temperature fluctuations. Dilute the starting liquid and ensure stable temperature.
- Smells rotten: Contamination by unwanted bacteria. Discard and start again with better-sanitized equipment and a fresh mother starter.
- White film that isn't the mother: Kahm yeast - a harmless but undesirable flat white film. Skim it off and continue fermentation. It won't harm the vinegar.
- Mother sank: Normal. A new mother may form on the surface and fermentation continues in the liquid regardless.
- Too sharp at completion: Dilute with a small amount of water, taste, and adjust. Over-sharp vinegar also mellows with months of aging in a sealed bottle.
Keeping and Growing Your Mother
Once you have a healthy, active mother, keep it going. Store in a small jar covered with finished vinegar in the refrigerator - it stays viable for months in cold storage. The mother grows with each batch, forming new layers. Share it with friends (the tradition of passing along a vinegar mother is genuinely old) or use it to run multiple vinegar fermentations simultaneously in different bases. A thriving mother produces better, faster, more consistent vinegar than starting fresh each time.
For the full context of home vinegar within the broader vinegar landscape - including the types worth buying, the flavor profiles worth knowing, and the applications that suit each type — see the vinegar renaissance guide.
Flavor Variations: Beyond Apple and Wine
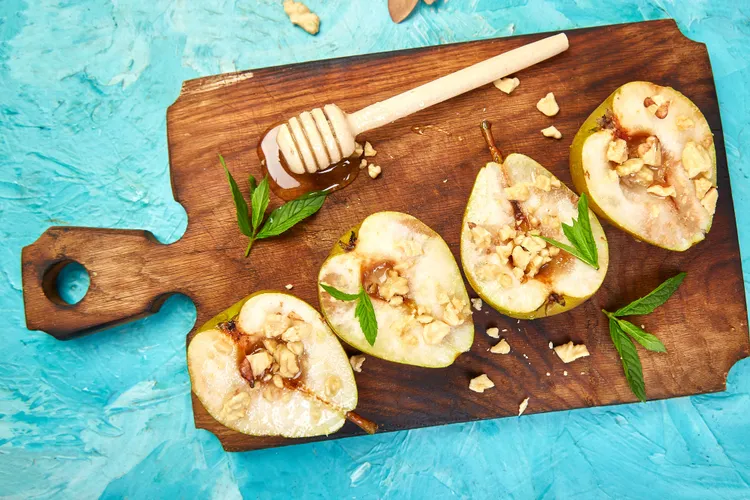
Once you've made a successful apple scrap vinegar and understand the process, the range of starting materials expands significantly. Pear vinegar from overripe or leftover pears has a delicate, slightly floral quality that works beautifully in light vinaigrettes. Honey vinegar (start with a simple mead at 8% ABV, then acetify) produces something with a complex sweetness that's closer to a mild champagne vinegar in flavor. Kombucha that has over-fermented past the point of being pleasant to drink makes an excellent vinegar base - the SCOBY's acetic bacteria are already active, and the fermentation to full vinegar takes only 2 to 4 weeks from an already-sour kombucha. Fruit wine vinegars from plums, peaches, or berries each produce something entirely different from apple or grape-based starting materials.
Aging Your Finished Vinegar
A freshly completed vinegar is often harsh and one-dimensional compared to the same vinegar after 3 to 6 months of aging in a sealed bottle. The aging process (in glass, at room temperature, in a cool dark cupboard) allows the harsh acetic acid notes to mellow and the underlying flavor compounds from the starting material to come forward. This is the same principle as barrel aging in commercial vinegar production - time in a vessel softens and integrates the flavors. If your homemade vinegar tastes too sharp immediately after completion, bottle it, seal it, and try it again in 6 weeks. The improvement is typically substantial. Some home vinegar makers keep small bottles from different batches and years to track how the flavor develops - it's genuinely interesting to taste a 6-month-old batch next to a 2-year-old batch made from the same starting material.
The Solera System at Home
Commercial sherry vinegar is aged using a solera - a system where young vinegar is blended with progressively older vintages, producing a complex final product that carries components from many years. You can run a simplified home version: rather than using all your finished vinegar, reserve about 20% in the fermentation vessel and add a new batch of alcoholic liquid. The retained mature vinegar inoculates the new batch quickly and contributes some of its complexity to the finished product. Over several cycles, the flavor builds. This is most worthwhile with wine vinegars where the starting material has real character - the solera effect on apple scrap vinegar is less pronounced because the flavor range of the starting material is narrower. Keep this going for a year and you'll have a genuinely complex vinegar with components from multiple batches.
Acidity Testing and When It Matters
For home use and cooking, acidity testing is optional - you can assess completeness by taste and smell. For gifting, selling (even informally), or any application where you're using the vinegar for preservation (canning, longer-term pickling), knowing the acidity matters. A digital pH meter is the most practical tool: target pH 2.8 to 3.0 for a 5% to 6% acetic acid vinegar, which is safe for all culinary preservation uses. pH strips are less accurate but sufficient to confirm you're in the right range. If you want to know the precise acidity percentage (not just pH), a titration kit (available online for $10 to $15) measures it directly. For everyday kitchen vinegar used in dressings, marinades, and cooking, none of this is necessary - taste tells you everything you need to know.
Oxygen Management: The Most Important Variable
More home vinegar projects fail from oxygen mismanagement than from any other cause. Acetobacter requires a continuous supply of oxygen at the surface of the liquid. The cloth cover needs to be breathable - not just loosely placed, but actually porous enough that air circulates through it. A damp cloth can become effectively sealed and stop the fermentation. Check the cloth every few days and replace it if it's wet. The jar size relative to the liquid volume also matters: ideally, the liquid should fill no more than 60% to 70% of the jar, leaving a significant air space above the surface. A narrow-neck bottle severely restricts oxygen access and dramatically slows acetification - use a wide-mouth jar. Finally, don't stir the fermentation after Stage 2 begins - stirring disrupts the mother and submerges the oxygen-consuming colony into anaerobic liquid where it can't work effectively.
When to Harvest Partially vs. Fully
Not all the vinegar in a batch needs to be harvested at once. A common technique is "cascade bottling" - drawing off about 30% to 40% of the finished vinegar, leaving the rest (including the mother) in the vessel, and adding a new charge of alcoholic liquid. This continuous production method keeps the mother active and productive, produces vinegar more quickly on each subsequent batch (the established mother colony is faster than a new one), and builds a more complex flavor profile over time as the residual vinegar contributes some depth to each new batch. The only requirement: the vessel must never be more than about 70% full to maintain the oxygen headspace that the fermentation requires.
Latest