Mason Jar Cold Brew: No Special Equipment Needed
A complete Mason jar cold brew concentrate method using only a jar, a fine strainer, and cheesecloth or a paper filter - no dedicated equipment required.
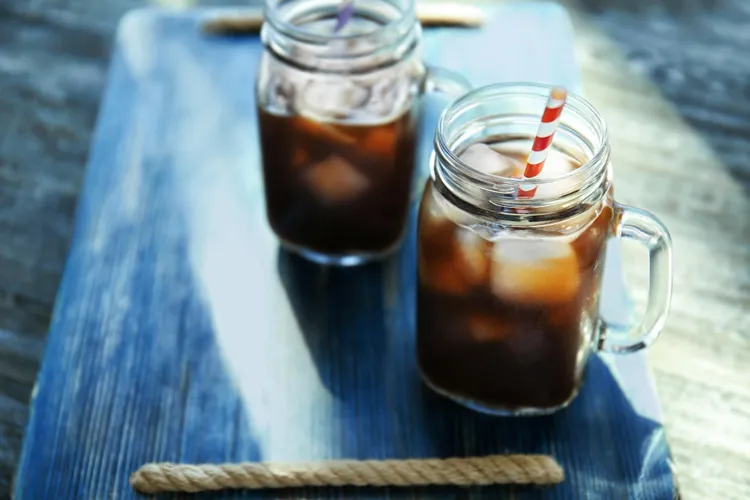
A dedicated cold brew maker or Toddy system is convenient, but it's genuinely optional. A large Mason jar, a fine mesh strainer, and either cheesecloth or a paper coffee filter produce concentrate that's just as good, using equipment most kitchens already have on hand.
What You'll Need
- A large Mason jar or similar wide-mouth glass jar, at least 1 quart (32 oz), or a 2-quart jar for a bigger batch
- Coarsely ground coffee (see our grind size guide if you need the specifics)
- Filtered water
- A wooden spoon or chopstick for stirring
- A fine mesh strainer
- Cheesecloth and/or a paper coffee filter for the second filtering pass
- A second clean jar or airtight container for the finished, filtered concentrate
- A kitchen scale, ideally, for accurate measuring
Step-by-Step Method
- Weigh out your coarsely ground coffee using a 1:4 to 1:5 ratio to water - for a 1-quart jar, roughly 100 to 125g coffee to 500g water is a good starting point. See our ratio guide for exact scaling.
- Add the grounds to the jar, then pour the water over them slowly, making sure all the grounds get saturated rather than sitting in a dry clump at the bottom or floating unmixed on top.
- Stir gently with a wooden spoon or chopstick to fully incorporate the grounds, breaking up any dry pockets.
- Seal the jar with its lid (or cover loosely with plastic wrap if the lid doesn't seal well) and let it sit at room temperature or in the refrigerator for 12 to 24 hours. See our steep time guide for how to choose within that window.
- After steeping, pour the mixture through a fine mesh strainer into a second container to remove the bulk of the grounds.
- For a cleaner result, line the strainer with cheesecloth for this first pass, or pour the once-strained liquid through a paper coffee filter set in a funnel for a second, finer pass. See our filtering guide for the full comparison of methods.
- Transfer the filtered concentrate to a clean, airtight jar and refrigerate.
Common Mason Jar Issues and Fixes
- Grounds floating instead of saturating: Stir more thoroughly right after adding the water, and press down gently on any dry clumps with the back of a spoon.
- Slow straining: This is normal with a fine mesh strainer and a full batch of grounds - let gravity do the work rather than pressing or squeezing the grounds, which pushes more fine sediment through and clouds the result.
- Jar lid smells like coffee afterward: Wash the lid and any rubber gasket promptly after use; coffee oils can linger on plastic and rubber components if left too long.
- Not enough room in the jar: Leave at least an inch of headspace when filling, since the grounds will expand slightly as they absorb water during the steep.
Scaling the Mason Jar Method Up or Down
A quart jar works well for a single person's few-day supply; a half-gallon or 2-quart jar scales this up for a bigger household or a longer stretch between batches, using the same ratio just scaled proportionally. If you're making a genuinely large batch meant to last a full week, see our batch scaling guide, since very large volumes benefit from a few adjustments beyond simply multiplying the recipe.
Do You Need a Fine Mesh Strainer Specifically
A standard kitchen fine mesh strainer works fine for the first filtering pass, but if you don't have one, a clean colander lined with a few layers of cheesecloth accomplishes largely the same thing. The goal at this stage is just removing the bulk of the grounds; the finer filtering (paper filter) is what actually gets you a clear, sediment-free concentrate, so don't worry too much about the first pass being perfect.
Why This Method Works Just as Well as Dedicated Equipment
Dedicated cold brew makers are really just a jar, a built-in filter, and sometimes a spigot, packaged together for convenience - none of which changes the underlying chemistry of how cold brew extracts. A Mason jar and a couple of filtering passes produce concentrate that's genuinely comparable in quality, just with a slightly less streamlined process. If you make cold brew often enough that the extra steps start to feel like a real hassle, that's the point where dedicated equipment starts to earn its cost - see our equipment comparison for that decision.
Cleaning Up
Used coffee grounds compost well if you have a compost setup, or can simply go in the trash. Rinse the jar promptly after removing the concentrate to avoid coffee residue and oils building up and affecting the flavor of future batches, and periodically give jars, strainers, and filters a more thorough wash with dish soap to prevent oil buildup that can eventually turn rancid and add off-flavors to new batches.
Choosing the Right Jar Size for Your Household
A quart jar makes a modest amount of concentrate, enough for roughly 4 to 6 diluted servings depending on how strong you like your coffee, which suits a single person well for a few days at a time. A half-gallon jar roughly doubles that, a reasonable choice for a two-person household or anyone who wants a bit more buffer between batches. Whatever size you choose, make sure your refrigerator actually has room for it before committing, since a full half-gallon jar takes up more shelf space than it might seem while you're picturing it empty on the counter.
Using a Jar Without a Tight-Sealing Lid
Not every large jar comes with a genuinely airtight lid, and that's fine for the steeping stage specifically, since the goal during steeping is just keeping dust and debris out, not creating a fully sealed environment. A layer of plastic wrap secured with a rubber band works as a reasonable substitute if your jar's lid doesn't seal well. Once you've filtered the concentrate and are moving to longer-term storage, though, a genuinely airtight container matters more, since that's the stage where minimizing air exposure actually extends shelf life meaningfully.
Troubleshooting a Mason Jar Batch That Didn't Turn Out Well
If a Mason jar batch tastes off despite following the method here, the issue is almost always in the ratio, grind, or steep time rather than the jar method itself, since a jar is really just a neutral vessel that doesn't affect the chemistry of extraction. See our troubleshooting guide for working through the most common causes by symptom, whether that's weak, bitter, sour, or gritty results.
Reusing the Same Jar for Multiple Batches
A single Mason jar can be reused indefinitely for successive batches, as long as it's washed thoroughly with dish soap between uses - hot water alone often isn't enough to fully remove coffee oils, which can build up over time and add an increasingly stale or bitter undertone to new batches if left unaddressed. A quick scrub with a bottle brush reaches the corners and bottom of the jar more effectively than just swishing water around, and it's worth doing this every time rather than only occasionally.
Making the Mason Jar Method Even Simpler
Once you've made a few batches this way, the process becomes quick enough to fold into an existing routine without much friction - measuring grounds and water takes a couple of minutes, and the actual steeping happens without any attention needed until it's time to filter. Many people find it easiest to start a new batch the same day or evening they finish filtering the previous one, which keeps a consistent supply going without gaps.
Adapting This Method for a Smaller or Larger Household
Everything in this method scales linearly, so a single person wanting a smaller, more frequent batch can simply use a pint jar with roughly half the coffee and water listed above, while a larger household can move up to a half-gallon or gallon jar following the same 1:4 to 1:5 ratio scaled proportionally. The steps themselves don't change with jar size, only the quantities, which makes this method genuinely flexible as your needs change over time without requiring any new equipment or a different process to learn.
Why This Method Is a Good Starting Point Even If You Plan to Upgrade Later
Even if you eventually plan to invest in a dedicated cold brew maker, starting with the Mason jar method first gives you a genuine feel for the fundamentals - saturation, steep time, filtering - without the added variable of new equipment to learn at the same time. Many people find that after a few Mason jar batches, they have a much clearer sense of exactly what they want from dedicated equipment, whether that's faster filtering, larger capacity, or simply less hands-on effort, which makes any eventual equipment purchase a more informed one.
What Makes This Method Genuinely Reliable
The reason this simple approach produces results on par with dedicated equipment comes back to a point made throughout this guide: extraction chemistry doesn't care what vessel it's happening in, only the ratio, grind, and time actually matter for flavor outcome. A Mason jar's only real job is holding the coffee and water together in a sealed, dark environment for the steep, something any reasonably sized clean jar accomplishes just as well as an expensive dedicated system.
A Complete Mason Jar Batch, Start to Finish, With Timing
To put the full process together with realistic timing: measuring and combining coffee and water takes about 5 minutes, the steep itself runs 12 to 24 hours unattended, and filtering (the two-stage method) takes another 30 to 60 minutes, though most of that is passive waiting rather than active work. All told, the actual hands-on time across an entire batch, from start to a jar of finished concentrate in the fridge, is well under 15 minutes, with everything else happening on its own while you go about your day or sleep through the night.
Why This Method Deserves More Credit Than It Gets
It's easy to assume the simplest, cheapest option must be an inferior compromise compared to purpose-built equipment, but cold brew is one of the rare cases in cooking and beverage-making where that assumption doesn't hold up. A jar genuinely does everything a dedicated system does at the level that actually affects flavor, and the extra convenience dedicated equipment offers is real but separate from any claim about producing better-tasting concentrate.
A Few Extra Tips From Repeat Batches
After making a few batches this way, most people pick up a handful of small efficiencies that aren't strictly necessary but make the process a bit smoother: pre-measuring coffee into a small container the night before so it's ready to go in the morning, keeping the strainer and filtering setup assembled in a dedicated spot rather than digging it out each time, and choosing a consistent time of day to start each new batch so the whole rhythm becomes close to automatic. None of these are required, but they're the kind of small adjustments that make an already-simple process feel even more effortless over time, turning what could be a chore into something closer to muscle memory.
To recap the full process in a few lines: weigh coffee and water using a 1:4 to 1:5 ratio, stir thoroughly to saturate the grounds, seal and steep for 12 to 24 hours, then strain through a coarse filter followed by a fine paper filter before storing in an airtight container. That's the entire method, and it requires nothing beyond what most kitchens already have on hand.
From Mason Jar to Finished Drink
Once you've got filtered concentrate in the fridge, the process shifts to dilution and serving - see our dilution guide for specific ratios, or head back to the complete cold brew concentrate guide for the full picture. Whatever equipment path you eventually settle on, this simple jar-and-strainer method remains a perfectly good fallback any time you're traveling, staying somewhere without your usual setup, or simply want to make a batch without digging out dedicated gear, and it's worth keeping in your back pocket as a reliable option even after you've upgraded to something more specialized.
Latest