Common Food Photography Mistakes and How to Fix Them
Most food photography mistakes are fixable in under a minute once you know what to look for. Here are the 10 most common errors home cooks and food bloggers make, and exactly how to correct them.
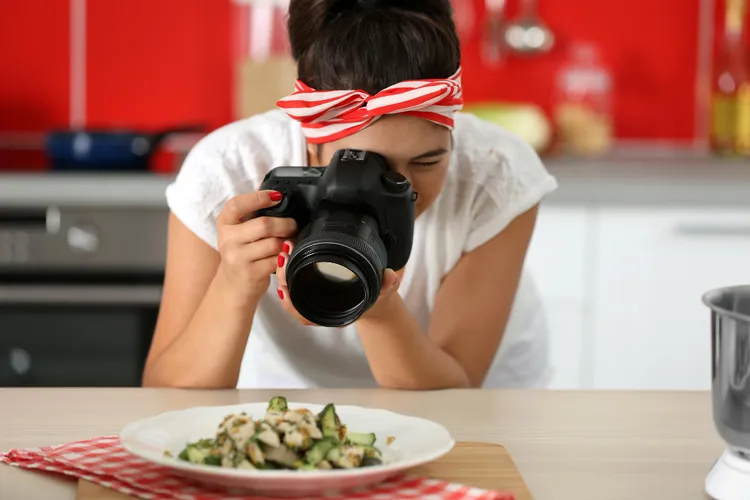
The fastest route to better food photos isn't buying better gear - it's stopping the things that are actively hurting your current shots. Most problems are habits rather than skill gaps, which means they're quick to fix once identified.
1. Shooting with Mixed Light Sources
The problem: Kitchen ceiling lights on at the same time as window light create two competing colour temperatures - warm yellow from the bulbs, cool blue from the window. The result is an unnatural colour cast that looks bad and is very hard to fix in editing.
The fix: Turn off all artificial lights when shooting near a window. Natural light only. If you're shooting at night with an LED panel, turn off all other lights in the room.
2. Shooting from Too Far Away
The problem: The food occupies a small area in the centre of the frame surrounded by a lot of irrelevant background. The image looks distant and unengaging.
The fix: Move the camera closer. The food should fill at least 60-70% of the frame. Use the phone's 1x optical lens and physically move closer rather than pinching to zoom.
3. Using Digital Zoom
The problem: Pinching to zoom on a smartphone is a digital crop - it degrades image quality and increases noise. Photos look soft and grainy.
The fix: Move your feet. If the dish is too small to fill the frame from a comfortable shooting distance, switch to the 2x optical lens (on phones with multiple cameras) rather than zooming digitally.
4. Dirty Plate Edges
The problem: Sauce splashes and drips around the rim of the plate are almost invisible when plating food but immediately obvious in a photo. They make dishes look careless.
The fix: Keep folded kitchen paper within reach. Wipe plate edges clean just before every shot. This five-second habit is one of the highest-return improvements you can make.
5. Cluttered Backgrounds and Too Many Props
The problem: Multiple props, a busy tablecloth, cooking equipment in the background, and other elements compete with the food for attention. The eye doesn't know where to look.
The fix: Maximum three elements in the frame: main dish, one secondary element (a sauce or side), and one prop (a napkin or utensil). Remove everything else from the shooting area before taking the shot. Our guide to food photography props covers what's worth keeping and what isn't.
6. Wrong White Balance
The problem: Food looks unnaturally yellow-orange (too warm) or blue-grey (too cool). The colour of the food doesn't match reality.
The fix: Set white balance manually in your camera app or lock it before shooting. Check that white areas - the plate, a napkin - look white on screen, not cream or grey. Correct in editing using the Temperature slider in Lightroom Mobile. Full detail in our smartphone camera settings guide.
7. Shooting at the Wrong Angle
The problem: Default eye-level shooting from standing height doesn't flatter most dishes. Soups look like murky circles. Salads look flat. Tall dishes get their height cut off.
The fix: Match the angle to the dish. Overhead for soups and bowls; 45-degree for most everyday dishes; straight-on for tall items. Our guide to food photography angles covers the decision framework in detail.
8. Flat, Shadowless Light
The problem: Shooting directly under overhead lights or using flash produces flat, even illumination with no shadows. The food looks two-dimensional and textureless.
The fix: Use side lighting - a window to the left or right of the food. Shadows reveal texture and add depth. Don't fill all the shadows with a reflector unless the contrast is excessive.
9. Over-Editing
The problem: Heavy saturation, extreme contrast, and excessive filters make food look artificial and unappetising. The colours no longer match the food in real life, which erodes trust for food bloggers.
The fix: Edit for correction, not transformation. Fix what the camera got wrong; don't try to change the mood of the photo dramatically. If an edit looks obvious, pull it back by 50%. Our phone editing guide walks through a restrained editing workflow.
10. Not Shooting Enough Frames
The problem: Taking two or three shots and walking away. In professional food photography, dozens of frames are taken per dish. The best shot is almost never the first one.
The fix: Take at least 10-15 shots per setup, varying angle, crop, and prop placement slightly between shots. Review on a larger screen (laptop or tablet) if possible - what looks acceptable on a small phone screen often reveals problems at larger size. The best frame is usually in the middle of a burst, not the first or last.
Avoiding these mistakes is the quickest route to improvement. For a complete grounding in all the positive techniques, start with the food photography guide for home cooks.
Latest