Food Photography for Home Cooks: A Complete Guide
You don't need a professional camera or a studio to take photos that make people stop scrolling. This guide covers everything home cooks and food bloggers need to shoot beautiful food photos using a smartphone and budget-friendly gear.
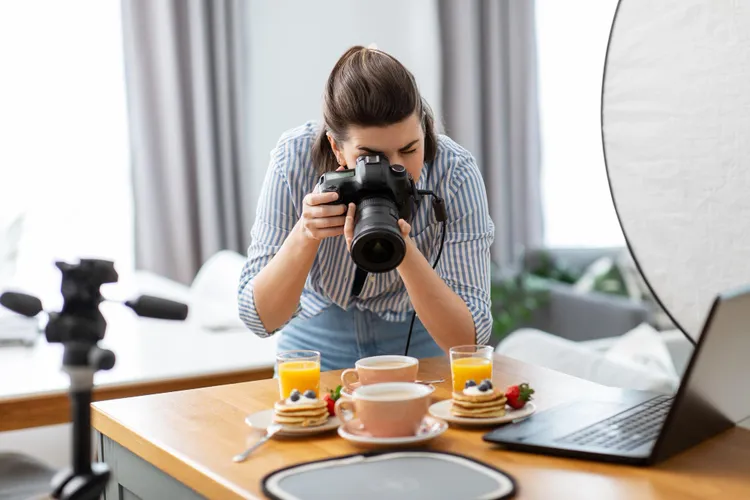
Most great food photos come down to three things: light, composition, and a bit of patience. The camera in your pocket is capable of stunning results - the gap between a forgettable shot and a scroll-stopping one is almost never about the equipment.
Why Good Food Photography Matters
For home cooks sharing on Instagram or Pinterest, a good photo is the difference between engagement and silence. For food bloggers, it directly affects traffic - Pinterest, in particular, rewards high-quality vertical images with dramatically more reach. A well-shot recipe photo also builds trust. Readers are more likely to try a recipe when the finished dish looks achievable and appetising.
The good news: the fundamentals are learnable in an afternoon. Once you understand light and composition, you'll apply them automatically.
The Most Important Element: Light
Light makes or breaks a food photo. Specifically, natural light from a window is your best friend. It's soft, directional, and free. The ideal setup is a table positioned 1-2 feet from a large window, with the light hitting the food from the side rather than directly from above or behind.
Avoid overhead ceiling lights and flash - they flatten the image and create harsh shadows. If you're shooting at night or in a dark kitchen, a cheap LED panel light (around $20-30) placed to the side mimics window light reasonably well. For everything you need to know about maximising natural light, read our guide on using natural light for food photography.
Composition Basics
Composition is how you arrange elements within the frame. Three rules cover most situations:
- Rule of thirds: Turn on your phone's grid overlay (Settings > Camera > Grid). Place the main subject at one of the four intersection points, not dead centre.
- Negative space: Leave empty space around the food. It draws attention to the subject and gives the image room to breathe.
- Leading lines: Use cutlery, napkins, or the edge of a board to guide the viewer's eye toward the main dish.
The angle you shoot from changes everything. Overhead (flat lay) works well for bowls, pizzas, and dishes with interesting toppings. A 45-degree angle suits burgers, stacked items, and anything with height. Straight-on is best for tall drinks and layered cakes. More detail on this in our guide to food photography angles.
Styling: Making the Food Look Its Best
Food styling doesn't mean making food look fake. It means presenting it clearly and attractively. A few practical habits:
- Wipe the edges of the plate before shooting - stray sauce or smears read as messy even if the dish tastes great.
- Add a fresh herb garnish (parsley, basil, chives) right before shooting. A sprinkle of flaky salt also adds visual texture.
- Don't overfill the plate. Restaurant portions photograph better than heaped home portions.
- Steam and freshness matter - shoot immediately after plating, before the food cools and loses its sheen.
For a deeper dive, our food styling tips for home cooks covers plating, garnishes, and how to handle tricky dishes like soups and stews.
Backgrounds and Surfaces
The surface your food sits on is often as important as the food itself. A cluttered or distracting background kills an otherwise good photo. Simple, consistent backgrounds - a light wood board, a white tile, a dark slate - keep the focus on the food.
You don't need to buy expensive props. A piece of vinyl wrap printed to look like wood or marble costs around $15 and folds flat for storage. Thrift stores are excellent for mismatched plates, linen napkins, and small props that add character. Our full guide on food photography backgrounds covers what works at every budget.
Smartphone Settings Worth Knowing
Most people shoot food on full auto and leave performance on the table. Two habits that immediately improve results:
- Lock exposure and focus: On iPhone, tap and hold on the main subject until the yellow AE/AF lock banner appears. On Android, tap to focus, then manually adjust the exposure slider. This stops the camera from auto-adjusting mid-shot.
- Use Portrait or Food mode: Many phones now have a dedicated Food mode. It sharpens the subject and softens the background slightly - useful for close-up shots of individual dishes.
For the full breakdown of camera settings, see our guide to smartphone camera settings for food photos.
Editing: The Last 20% That Makes a Big Difference
Even a well-shot photo benefits from a small amount of editing. The goal is not to transform the image but to correct it - fix the white balance if the food looks too yellow or blue, lift the shadows slightly, and add a touch of clarity to make textures pop.
Lightroom Mobile (free version) and Snapseed are both free and capable. A basic edit takes 2-3 minutes once you know what you're doing. Our step-by-step phone editing guide walks through the exact workflow.
Building a Consistent Home Setup
Consistency matters for food bloggers building a recognisable visual style. That doesn't mean every photo looks identical - it means shooting in the same light, using a consistent colour palette of props, and editing with the same presets or adjustments.
A dedicated corner of your kitchen or dining room can become a reliable shooting spot. You need a table near a window, 2-3 background surfaces, a small prop collection, and a reflector (a piece of white card does the job). Our guide to building a DIY food photography setup shows exactly how to put this together for under $50.
Common Beginner Mistakes
The fastest way to improve is to stop doing things that actively hurt your photos:
- Shooting with overhead kitchen lights on alongside window light - the colour temperatures clash and create an unflattering mixed-light cast.
- Including too many props - three elements maximum in most shots.
- Shooting from too far away - get closer to the food.
- Using digital zoom - move your feet instead; zoom degrades image quality significantly.
- Forgetting to clean the plate edges before shooting.
For a full rundown, see our guide to the most common food photography mistakes.
Shooting for Different Platforms
Instagram and Pinterest have different format preferences and audience behaviours. Instagram performs best with square or portrait (4:5) images and a consistent aesthetic. Pinterest strongly favours tall vertical images (2:3 ratio) with text overlay. Shooting with both in mind - or cropping one shoot for both - saves time and maximises reach. Full details in our guide on shooting for Instagram vs Pinterest.
The Learning Curve Is Short
Most people see a noticeable improvement within their first 2-3 shoots after learning the basics. The key is to shoot deliberately - pick one thing to focus on each session, whether that's lighting, composition, or styling. Review your shots critically, identify the weakest element, and fix it next time.
The recipes you're already cooking are the subject matter. The skills in this guide are the only thing standing between your food and photos that actually do it justice.
Latest