Kitchen Temperature and Why It Matters for Laminated Dough
Practical fixes for laminating croissant dough in a normal home kitchen that runs warmer than a professional bakery's cold room.
Professional bakeries laminate dough in cold, climate-controlled rooms, often in the 60 to 65°F range. Most home kitchens run 10 to 15 degrees warmer than that, which is exactly why lamination is so much more failure-prone at home - and why a handful of temperature workarounds matter more here than almost any ingredient substitution.
Why Temperature Matters So Much in Lamination
Butter and dough need to stay at roughly matching firmness throughout rolling and folding. Butter softens faster than dough does at the same ambient temperature, since it has a lower melting point and responds quickly to both room heat and the friction generated by rolling itself. Once butter gets meaningfully softer than the dough surrounding it, it stops rolling out as an even sheet and instead smears, tears, or gets pushed through weak points in the dough - any of which merges butter and dough together and eliminates the separate layers lamination depends on.
Signs Your Kitchen Is Running Too Warm
- Butter starts to feel soft or slightly greasy to the touch within a minute or two of taking the dough out of the fridge
- The dough becomes noticeably harder to handle partway through a single roll, sticking more or resisting less
- You see any hint of butter color (a slightly yellow streak) showing through the dough surface during rolling
- The dough feels warm rather than cool when you press a hand flat against it
Any of these signs mean it's time to stop and refrigerate, even if you haven't finished the current fold.
Practical Fixes for a Warm Kitchen
Chill your tools, not just the dough
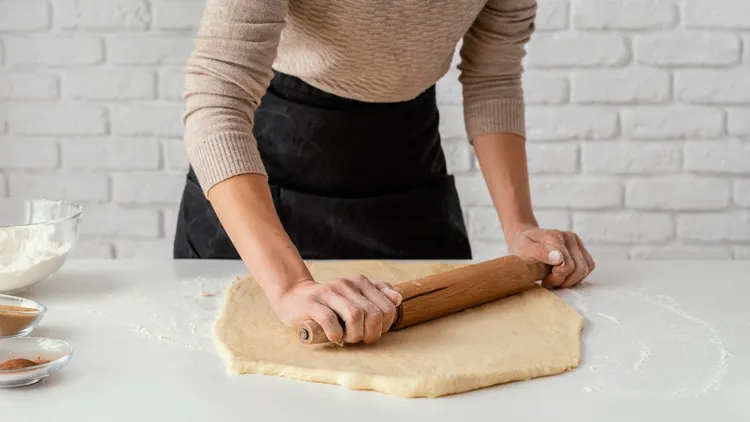
A rolling pin and work surface that start at room temperature absorb heat from your hands and transfer it to the dough throughout rolling. Chilling a marble or metal rolling pin in the freezer for 15 minutes before use, or working directly on a chilled sheet pan (if your counter space allows it), removes one of the more overlooked heat sources in the process.
Work in short bursts with real chilling breaks
Rather than trying to power through an entire fold in one go, plan to roll for a set, short window - a minute or two - and return the dough to the fridge the moment it starts to feel soft, even mid-roll if necessary. This feels slower in the moment but produces far more consistent results than pushing through with softening butter.
Choose the coolest time of day and coolest room available
If your kitchen has significant temperature swings over the course of a day, laminate during the coolest window - typically early morning, before cooking or appliance heat has built up. If you have air conditioning, running it a bit colder than usual specifically during lamination days makes a real difference.
Use higher-fat, lower-moisture butter
European-style butter with 82% or higher fat content is more forgiving of ambient warmth than standard butter, since it has less water content to begin with and holds its structure over a slightly wider temperature range. This doesn't eliminate the need for careful temperature management, but it does widen your margin for error.
Freeze briefly between chilling sessions if things go sideways
If the dough gets noticeably too warm mid-process, a short 10 to 15 minute stint in the freezer (rather than just the fridge) can bring things back under control faster than waiting it out in the refrigerator alone. Watch closely, though - freezing too long risks the butter becoming too firm and cracking on the next roll.
What About Working Too Cold?
It's a less common problem for home bakers, but butter and dough can also be mismatched in the other direction - butter so cold it cracks and shatters rather than rolling smoothly, while the surrounding dough is comparatively soft. If this happens, let the whole package sit at room temperature for 5 to 10 minutes before continuing, checking frequently, rather than forcing the roll and risking tearing through the dough where the brittle butter has cracked.
A Simple Temperature Check Before Each Fold
Before starting each roll-and-fold, press a finger gently into the dough package (through the plastic wrap) right where you know the butter sits. It should feel firm and give slightly, similar to how cold (not frozen) butter feels straight from the fridge - not hard as a rock, but not soft or yielding either. If it feels notably softer than that, give it another 10 to 15 minutes in the fridge before proceeding.
Ambient Humidity Matters Too
Beyond raw temperature, a humid kitchen can make dough stickier and harder to manage during rolling, requiring more bench flour, which in turn can dry out the dough's exterior if overused. This is a smaller factor than temperature but worth noting if your kitchen runs both warm and humid - work a bit faster and don't be afraid to use enough bench flour to keep things moving smoothly, brushing off the excess before each fold.
Why This Effort Is Worth It
Every fix in this guide amounts to buying the butter more time at the right firmness before it has a chance to soften past the point of usefulness. It can feel like a lot of extra fuss for a home baking project, but this single factor - kitchen temperature - is responsible for more failed lamination attempts than any ingredient choice or technique detail. Getting it under control is often the difference between a dense, disappointing batch and one with genuinely visible, flaky layers.
Setting Up a Cooler Workflow Before You Start
A little preparation before you even take the dough out of the fridge makes the whole process go more smoothly. Clear your counter space fully in advance so you're not scrambling to move things around mid-roll, since every extra minute spent fumbling is a minute the butter is warming. Have your rolling pin, a bench scraper, and any measuring tools already within reach. If you plan to chill your rolling pin or work surface, do that ahead of time as well, so it's ready the moment you need it rather than adding another delay once the dough is already out and starting to soften.
Seasonal Considerations
Kitchen temperature isn't static throughout the year, and it's worth being realistic about when lamination is genuinely harder. A kitchen in the middle of summer, especially without strong air conditioning, can easily sit at 78 to 82°F, which is a meaningfully tougher environment for lamination than a 68°F kitchen in cooler months. If you're finding lamination consistently frustrating and can't pin down why, check whether the season itself is working against you - the same recipe and the same care can produce quite different results depending on ambient conditions that have nothing to do with your technique. Some bakers deliberately save croissant projects for cooler months specifically for this reason, at least until they've built up enough experience to manage a warm kitchen confidently.
Using a Simple Thermometer
An inexpensive instant-read thermometer, the kind used for meat, can be a genuinely useful tool for croissant lamination too. Rather than relying purely on touch, you can insert it briefly into the dough package (avoiding puncturing all the way through to the butter layer itself) to get an actual number. Butter for lamination generally performs best in the 55 to 60°F range - firm enough to roll cleanly, soft enough not to crack. If you find your dough consistently reads warmer than that right before you start rolling, it's a clear, objective signal to extend your chilling time rather than relying on a guess.
Air Conditioning and Fans as Tools, Not Afterthoughts
If you have control over your kitchen's climate, it's worth treating it as an active part of your lamination setup rather than background conditions you have no influence over. Running the air conditioning a few degrees cooler specifically during a lamination session, or positioning a fan to keep air moving across your counter (without blowing directly and drying out the dough's surface), can meaningfully extend how long you have before the butter starts to soften. This is a small, one-time adjustment that pays off across the entire multi-day process, not just a single fold.
Working Without Air Conditioning
Not every kitchen has air conditioning available, and lamination is still genuinely possible without it - it just requires being more deliberate about timing and technique. Laminating early in the morning, before the day's heat builds up, is one of the most effective free adjustments available. A well-insulated cooler with ice packs, used as an impromptu extra "fridge" for the butter block or dough between very short working sessions, is a workable stopgap if your actual refrigerator space is limited or your kitchen simply won't cool down enough on its own. Even something as simple as working near an open freezer door for brief stretches (opened only as long as needed, to avoid warming the freezer itself excessively) can help in a pinch.
How Your Hands Contribute to the Problem
It's easy to overlook, but your hands are a genuine, continuous heat source throughout rolling and folding, and warmer hands transfer more heat to the dough with every touch. If you tend to run warm, briefly rinsing your hands under cold water and drying them thoroughly before handling the dough, especially right before a step where you'll be pinching seams or pressing edges, can make a small but real difference, particularly during longer sessions like the initial lock-in and first fold.
Recognizing When You've Solved the Problem
Once you've made temperature-conscious adjustments, the clearest sign they're working is that the dough consistently still feels cool and firm partway through each roll, rather than noticeably softening by the halfway point. If you find yourself no longer racing against the clock during each fold, and the butter still looks distinct and well-defined when you unwrap the dough for the next fold, that's a strong sign your kitchen setup has adapted well enough to the process.
Investing in a Marble Surface
A dedicated marble or granite pastry slab is a genuine upgrade for anyone planning to make laminated dough regularly, since stone holds cold far longer than a standard countertop and stays noticeably cooler to the touch throughout a working session. It's not a necessary purchase for an occasional croissant project, and a chilled sheet pan achieves a similar effect for free, but if lamination becomes a recurring hobby rather than a one-off attempt, it's one of the more worthwhile equipment investments specifically for this kind of baking.
How Professional Bakeries Handle This at Scale
It's worth understanding, if only for context, that commercial bakeries don't just rely on a cold room - they typically use dedicated dough sheeters (machines that roll dough to a precise, even thickness) working in tandem with walk-in coolers set specifically for lamination work, often in the low 60s Fahrenheit. This level of climate control simply isn't replicable in most home kitchens, which is exactly why the workarounds in this guide exist: they're not inferior shortcuts, but genuinely necessary adaptations for a process originally designed around equipment most home bakers don't have and don't need in order to get good, if not identical, results.
Balancing Speed and Care
There's a natural tension in warm-kitchen lamination between working quickly enough to beat the heat and working carefully enough to avoid rushed, sloppy folds or uneven rolling. The solution isn't to sacrifice one for the other, but to front-load the preparation - having tools ready, the workspace clear, and a clear mental plan for each roll before you start - so that the actual rolling itself can be both quick and controlled, rather than rushed and careless.
A Quick Pre-Lamination Checklist
- Clear counter space ready before removing dough from the fridge
- Rolling pin and tools chilled if the kitchen runs warm
- Kitchen at its coolest reasonable point for the day
- A plan for exactly how many strokes or minutes you'll roll before checking the dough
For how these temperature issues show up in the finished pastry, see our lamination mistakes guide. For the full recipe this applies to, see our classic croissant recipe, or head back to the complete croissant guide.
Latest