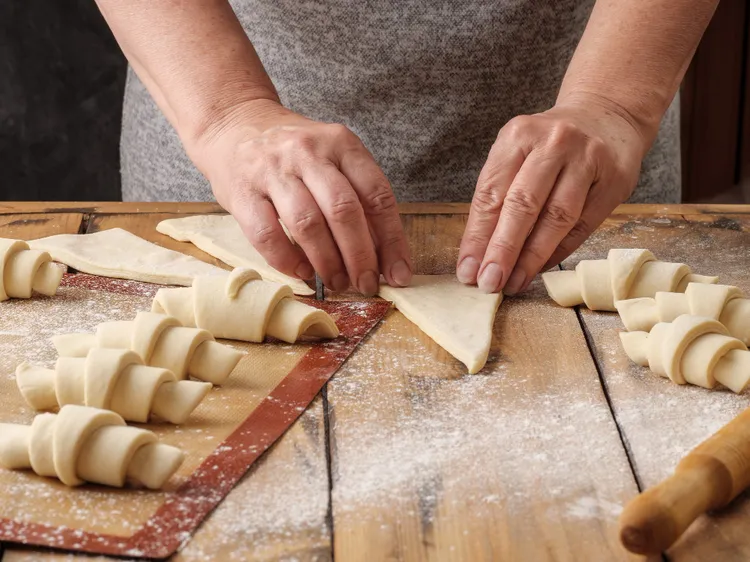
How to Shape Croissants for Even Baking
Technique details for cutting, stretching, and rolling croissant dough into an even, well-defined crescent shape that bakes consistently.
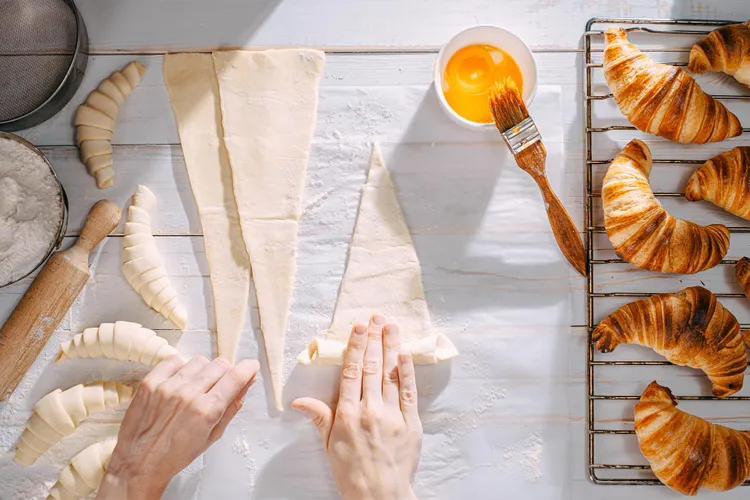
Shaping is where all the careful lamination work either pays off visually or gets undermined by an uneven roll. It's also one of the more mechanical, learnable parts of the whole process - a handful of specific technique details make a bigger difference here than natural dexterity.
Rolling Out the Laminated Dough
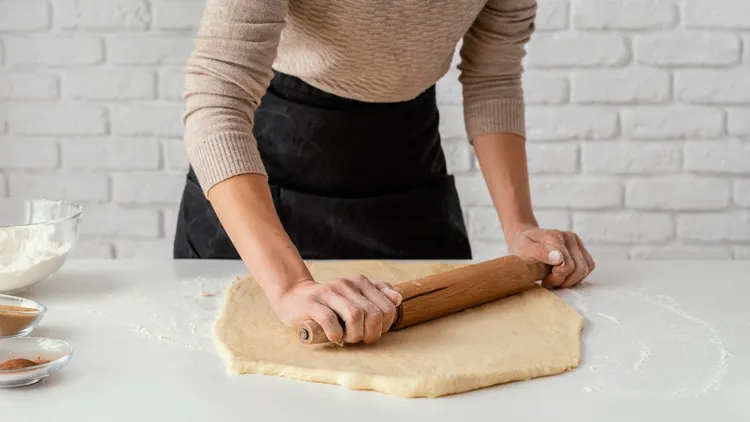
After the final fold and rest, roll the dough into a large, even rectangle, typically about 1/4 inch thick for standard croissants (slightly thinner, around 3/16 inch, for a more delicate result, though thinner dough is also more fragile to work with as a beginner). Roll from the center outward in each direction rather than back and forth over the same section repeatedly, which helps keep the thickness even and avoids overworking any one area.
Check the thickness in several spots with your fingers or a ruler rather than assuming it's even just because it looks that way - a rectangle can look flat while still hiding a thicker strip down the center where the rolling pin had less reach.
Trimming the Edges
The outer edges of the rolled dough won't have gone through the full folding process as many times as the interior, since folding naturally compresses layers more toward the center. Trim about 1/4 to 1/2 inch off each side with a sharp knife or pizza cutter before cutting your triangles. This step feels wasteful - you are, after all, discarding usable dough - but those edges bake up noticeably less flaky than the rest, and including them creates visibly denser spots in your finished croissants.
Save the trimmings; they can be gathered (not re-laminated, just pressed together) and baked as a rustic, less-defined pastry, or used as a base for something like a quick jam-filled turnover where perfect lamination matters less.
Cutting the Triangles
- Measure and mark the base width you want - typically 4 inches - along both long edges of the rectangle, offsetting the marks on one side by half the base width relative to the other, so the triangles interlock with minimal waste.
- Using a sharp knife, pizza wheel, or bench scraper, cut long diagonal lines connecting the marks, forming a continuous zigzag pattern of triangles.
- Use a clean, decisive cutting motion rather than sawing back and forth - a dull or dragging blade compresses the layers at the cut edge, which can seal them together and reduce how well they separate during baking.
- Each triangle should be roughly 4 inches at the base and 8 to 9 inches long from base to tip. Longer, narrower triangles produce a more elegant, many-coiled croissant; shorter, wider ones produce a stubbier, though still perfectly good, result.
The Base Notch
Cut a small, shallow notch (about 1/2 inch) in the center of each triangle's base before rolling. This small detail helps the two sides of the base curl slightly outward as you roll, which contributes to the classic tapered, slightly curved crescent silhouette rather than a flat, straight roll.
Stretching Before Rolling
Gently stretch each triangle lengthwise before rolling - hold the base in one hand and the tip in the other, and pull with light, even pressure until the triangle is noticeably longer than when you cut it, without tearing. This extra length translates into more visible coils in the finished shape and helps the croissant hold together better as it expands during baking. Don't stretch so aggressively that the dough tears or becomes uneven in width; a gentle, steady pull is enough.
Rolling the Shape
- Starting at the base (the notched end), roll the dough up toward the tip in one continuous, even motion, keeping consistent light tension throughout rather than rolling loosely in some spots and tightly in others.
- The tip should end up tucked underneath the rolled croissant, sealed against the body of the roll rather than sticking out - this prevents the tip from burning or unrolling during proofing and baking.
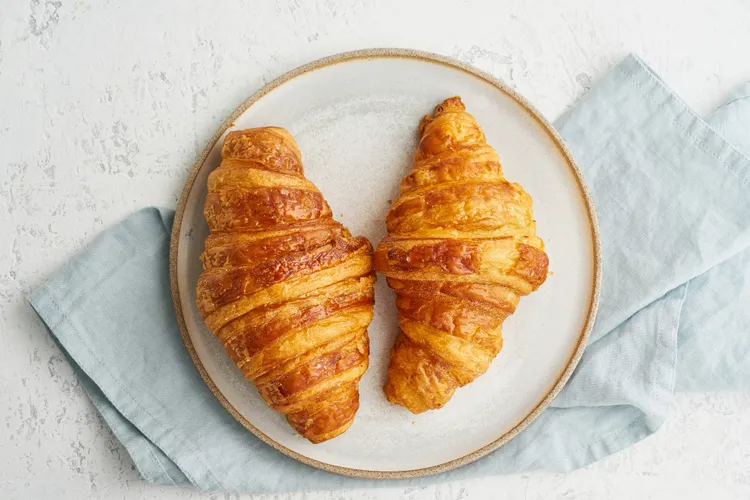
- Once rolled, curve the two ends of the croissant gently inward toward each other to form the crescent shape. Modern-style croissants are sometimes left straight instead, which is purely a stylistic choice and doesn't affect flavor or texture.
Common Shaping Mistakes
- Rolling too tightly: This can restrict the dough's ability to expand during proofing and baking, leading to a denser result and sometimes visible splitting along the seams.
- Rolling too loosely: The layers can separate and unroll slightly during proofing, leading to a looser, less defined shape.
- Not sealing the tip: An exposed tip is a common spot for butter to leak out during baking, in addition to being a likely spot to burn.
- Uneven triangle sizes: Croissants cut from mismatched triangles bake at different rates, so some may be done before others in the same batch.
Spacing on the Baking Sheet
Croissants expand significantly during both proofing and baking, more than most home bakers expect on a first attempt. Space shaped croissants at least 2 to 3 inches apart on the baking sheet, and don't crowd more than 5 or 6 onto a standard half-sheet pan. Crowded croissants proof and bake into each other, flattening their shape and interfering with even browning on the sides that touch.
After Shaping
Once shaped, croissants go straight into proofing, ideally without much delay - see our schedule guide for how this fits into the overall timeline, and our egg wash guide for what happens right before proofing begins.
Working With Dough That's Springing Back
Occasionally, especially with a slightly overdeveloped détrempe, the dough resists stretching and keeps springing back to a shorter length as you try to elongate the triangles before rolling. If this happens, don't force it - let the dough rest, loosely covered, for 5 to 10 minutes at room temperature, which relaxes the gluten enough to stretch more easily on a second attempt. Forcing an unwilling dough to stretch risks tearing it, which creates a weak point that can turn into a leaking spot during baking.
A Note on Uniform Sizing Across a Batch
It's worth taking the extra minute to measure your first triangle carefully with a ruler and use it as a template (either by eye or by cutting a paper pattern) for the rest of the batch, rather than eyeballing each one independently. Small size differences compound visually once a full tray of croissants is baked side by side, and consistent sizing also means more consistent baking times across the batch, so you're not pulling some out early to prevent overbaking while others are still underdone.
Left-Handed and Right-Handed Rolling
There's no single "correct" hand to roll with, but most people find they naturally develop a consistent rolling motion - always starting the roll from the same side, applying slightly more pressure with one hand than the other. This is completely fine and doesn't affect the final result meaningfully, but it's worth being aware of, since a consistent personal technique tends to produce a consistent (if slightly asymmetric) result across a whole batch, which reads as intentional and even rather than sloppy once you notice the pattern is repeatable.
Shaping Straight (Non-Curved) Croissants
Some bakers prefer to skip curving the ends inward after rolling, leaving a straighter, more log-like shape instead of the traditional crescent. This is a purely aesthetic choice with essentially no effect on flavor or texture, and it's slightly easier for beginners to execute consistently, since curving the ends evenly across a whole tray takes a bit of practice to do symmetrically. If your curved crescents are coming out visibly lopsided, it's a completely reasonable option to shape straight instead while you build confidence with the rolling technique itself.
What Happens If You Under- or Over-Roll
A croissant rolled too loosely - without enough tension as you roll from base to tip - can partially unravel during proofing, especially if the tip wasn't fully sealed underneath. One rolled too tightly can restrict the dough's ability to expand as steam builds during baking, sometimes causing a visible split along one side rather than an even rise. Both are recoverable lessons for the next attempt rather than serious problems for the current batch - an unraveled or split croissant still bakes up flavorful, just less visually tidy than a well-shaped one.
Shaping Rectangles Instead of Triangles
Not every laminated pastry needs the classic triangle-and-roll approach. Rectangular shapes, used for pastries like pain au chocolat or ham and cheese croissants, follow a different cutting pattern but rely on many of the same underlying principles - clean cuts, even thickness, and careful sealing of any seams or edges. Once you're comfortable with the triangle-cutting and rolling technique in this guide, the rectangular approach used for filled pastries tends to come easily, since it's a simpler cut requiring less precision than getting a symmetric triangle right.
How Many Croissants You Can Realistically Fit From One Batch
A standard batch of dough, rolled to the dimensions in this guide, typically yields 10 to 12 croissants from the triangle-cutting pattern described above, though this can vary a bit depending on exactly how wide you cut each triangle's base. Cutting slightly narrower triangles yields a few more, smaller croissants; cutting wider ones yields fewer, larger ones. Neither is more correct - it's a matter of preference for how substantial you want each finished pastry to be.
Handling Scraps From Trimming
The trimmed edges discussed earlier don't need to go to waste even though they're not ideal for a full croissant shape. Pressed together (gently, not aggressively kneaded, which would undo what lamination remains in them) and rolled out again, they can be cut into small squares or strips and baked as a simple, rustic treat - brushed with butter and cinnamon sugar, for instance, or simply baked plain and enjoyed as a baker's snack while the main batch proofs.
Tools That Make Cutting Easier
A rolling pastry wheel, sometimes called a pizza cutter when used in the kitchen more broadly, tends to give cleaner cuts through laminated dough than a knife for most home bakers, since the rolling motion shears through the layers rather than dragging or compressing them the way a knife blade can if it's even slightly dull. A bench scraper with a straight, sharp edge is another good option, particularly useful for the initial trimming cuts along the rectangle's edges, where a long, straight cut matters more than intricate maneuvering.
Working on a Floured Surface Without Overdoing It
Some bench flour is necessary to keep the dough from sticking during rolling and cutting, but too much dries out the dough's surface and can work its way into the shaped croissant, creating small raw-flour pockets that taste slightly off once baked. Use just enough flour to keep things moving smoothly, and brush off any visible excess from the surface of the dough before shaping and again before the first egg wash coat, so it doesn't end up baked into the final crust.
Practicing the Motion Before Committing to a Full Batch
If shaping feels unfamiliar, it's entirely reasonable to practice the rolling motion on a small scrap of ordinary, non-laminated dough (even a bit of leftover bread or pizza dough) before working with your actual laminated batch. This lets you build muscle memory for the tension and rolling technique without any risk to the real dough, which is especially useful if this is your first time attempting the shape at all.
Photographing Your Shaping Progress
Taking a quick photo of your shaped, unproofed croissants before they go into proofing is a small habit that pays off later - comparing that photo against the finished, baked result helps you see exactly how much a given shape expanded and whether the proportions held up the way you expected, which is useful diagnostic information for adjusting your next batch's shaping technique. Over several batches, this kind of simple before-and-after comparison often reveals patterns - consistently uneven curling on one side, for instance - that are much easier to spot in photos side by side than to recall from memory alone.
For the complete recipe this shaping step is part of, see our classic croissant recipe, or head back to the complete croissant guide.
Latest