Why Your Croissants Aren't Flaky: Common Lamination Mistakes
How to diagnose a dense or greasy croissant by working backward from the finished pastry to the specific lamination mistake that caused it.

A croissant that comes out dense, heavy, or more like enriched bread than flaky pastry has almost always suffered a lamination failure somewhere along the way - and the good news is that the finished croissant itself gives you real clues about where in the process things went wrong.
What "Flaky" Actually Requires
A flaky, open croissant crumb depends on distinct, unbroken layers of butter surviving all the way from lamination to the oven. Each layer of butter releases steam during baking, and that steam is what pushes the surrounding dough layers apart. If the butter layers have merged with the dough anywhere along the way, there's no steam release to separate them, and you get a denser, more uniform crumb instead of the honeycomb structure a good croissant should have.
Diagnosing From the Finished Croissant
Dense, bread-like interior with no visible layers
This points to the butter merging into the dough at some point during lamination, most often because the kitchen was too warm or the dough sat out too long between folds. Once butter fully incorporates into flour, it behaves like a fat mixed directly into a dough (similar to a brioche) rather than a separate laminating layer, and no amount of careful baking afterward can bring back the layer structure. See our temperature guide for how to prevent this on future attempts.
Some layers visible, but uneven or only on part of the croissant
This usually traces back to an unevenly sized or unevenly rolled butter block, or the dough and butter block being mismatched in size during the initial lock-in. Parts of the dough that never got proper butter coverage will bake denser than the rest. See our butter block guide for getting a more even, properly sized block on the next attempt.
Layers visible but the croissant is still heavy or greasy
This often means the dough proofed either too little or too much. Underproofed croissants haven't had time for the yeast to build enough structure to support the layers as they separate in the oven, so the whole thing collapses into a denser mass. Overproofed croissants can also collapse, since the gluten structure weakens past a certain point and can't hold the shape as steam pushes through it.
Flat, spread-out croissants with visible pooled butter
This is a more dramatic sign that butter escaped the dough entirely during baking rather than staying trapped to create steam. See our dedicated butter leaking guide for this specific failure.
The Most Common Root Causes
Kitchen too warm during lamination
This is, by a wide margin, the most common cause of lamination failure for home bakers. Professional bakeries laminate in dedicated cold rooms; most home kitchens run 68 to 75°F, which is warm enough to soften butter meaningfully within minutes of rolling. If your croissants consistently come out dense despite following the timing in a recipe, this is the first thing to address.
Not enough chilling time between folds
Even in a reasonably cool kitchen, the friction of rolling generates heat, and the dough needs real time in the fridge to fully firm back up before the next fold. Rushing this step, even by 10 or 15 minutes, compounds across three folds into a meaningfully warmer, softer butter layer by the final roll.
Overworking the dough during mixing
If the base dough was mixed too long or too vigorously, it develops more gluten than lamination needs, making it elastic and resistant to rolling. That resistance means you have to push harder and roll longer to get the dough to the right size, which generates more heat and softens the butter more than a properly relaxed dough would.
Rolling too aggressively or unevenly
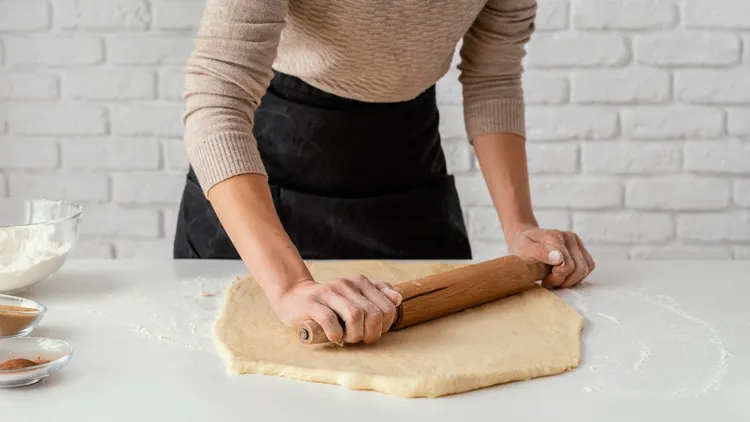
Heavy-handed rolling, especially rolling back and forth repeatedly in the same spot rather than working outward in even strokes, both generates excess heat and risks tearing through butter layers, letting them merge with the dough at that specific spot.
Uneven butter block or dough thickness
Covered in more detail in our butter block guide, but worth repeating here: any unevenness at the very start of lamination gets amplified, not smoothed out, by subsequent folds.
What a Successful Layer Structure Should Look Like
Cut a well-laminated croissant in half and you should see dozens of thin, distinct layers, with visible air pockets between many of them, giving the crumb a honeycomb or spiderweb appearance rather than a uniform, bread-like texture. The exterior should shatter slightly when you bite into it rather than simply tearing or squishing.
Fixing It on the Next Attempt
- Work in a cooler part of the kitchen if possible, or during a cooler part of the day.
- Don't shortcut chilling times between folds, even if the dough feels firm to the touch - internal temperature can lag behind how the surface feels.
- Consider chilling your rolling pin and work surface briefly before starting, especially in a warm kitchen.
- Work in short, decisive rolling strokes rather than many small back-and-forth passes.
- Trust the proofing time indicators (visibly puffy, jiggly when nudged) over the clock, since proofing speed varies by kitchen temperature.
When It's Not a Total Failure
Partial lamination failure - some good layers, some merged sections - still produces an edible, often quite good croissant, just not one with the dramatic, uniform layer structure of a bakery-quality version. It's worth eating and learning from rather than discarding, since the specific pattern of where it went dense tells you exactly which stage of the process needs more attention next time.
Keeping a Simple Bake Log
Because so many small variables affect lamination - kitchen temperature on a given day, how long each chill actually lasted, how the butter felt during rolling - it's genuinely useful to jot down a few quick notes right after each bake, while the details are still fresh. Something as simple as "kitchen felt warm, butter softened noticeably on the second fold, croissants came out okay but a bit dense on one side" gives you real information to act on next time, rather than trying to remember loosely what happened across a process that took two or three days. Over two or three batches, patterns tend to emerge quickly - most home bakers find one or two recurring issues rather than a different problem every time, and once you spot the pattern, it's usually straightforward to fix.
The Cut Test
One of the most informative things you can do with a finished croissant, especially an early attempt, is to cut it cleanly in half lengthwise with a sharp knife and really look at the cross-section rather than just tasting it. Compare what you see against a mental image (or a photo) of a well-laminated croissant's honeycomb interior - dozens of thin, somewhat irregular layers with visible air pockets scattered through them. If your cross-section shows large, uniform holes rather than fine layering, that points toward overproofing. If it shows almost no layering at all, closer to a uniform crumb, that points toward the butter merging into the dough at some point before baking. This single visual check does more to diagnose the specific failure than tasting alone.
How Much Variation Is Actually Normal
Even well-laminated, professionally made croissants show some natural variation from one pastry to the next within the same batch - slightly different layer counts, small asymmetries in the crescent shape, minor differences in how much they puffed. Don't chase a level of uniformity that isn't realistic even in a bakery setting. The goal on any given attempt is a clear, visible layer structure and a light, airy chew - not machine-perfect identical pastries.
Ruling Out Ingredient Issues
Before assuming a dense result is purely a technique problem, it's worth briefly ruling out ingredient issues too. Yeast that's old or was stored improperly (in a warm cabinet rather than the fridge, for instance) can under-perform even with perfect technique, leading to a denser result that looks similar to an underproofed batch. Similarly, a very low-fat butter substitute, or a butter that's actually a butter-margarine blend, behaves noticeably differently under lamination than a genuine high-fat butter, and can produce a flatter, less flaky result no matter how carefully the temperature is managed.
When the Problem Is in the Oven, Not the Dough
It's worth remembering that not every disappointing result traces back to lamination technique at all. An oven that isn't reaching its true set temperature, despite what the display says, bakes croissants more slowly, giving the structure more time to collapse or spread before it sets - which can look very similar to a lamination failure even when the dough itself was handled well. If you've carefully addressed every lamination variable in this guide and are still getting inconsistent results, an oven thermometer is a cheap, quick way to rule this out before assuming the fault lies entirely with your technique.
The Value of Isolating One Variable at a Time
When a batch doesn't turn out as hoped, it's tempting to change several things at once for the next attempt - a cooler kitchen, a different butter, longer chill times, and closer proofing monitoring, all at once. This is understandable, but it makes it much harder to know afterward which change actually mattered. Where practical, changing one variable at a time between batches, even though it means more attempts before you land on a fully dialed-in process, gives you much more reliable, specific knowledge about what your particular setup actually needs.
A Realistic Timeline for Improvement
Most home bakers see a noticeable jump in consistency by their second or third batch, once they've had a chance to observe their own kitchen's specific quirks under real conditions rather than following a recipe's assumptions blindly. By the fourth or fifth attempt, many people report reasonably reliable, genuinely flaky results most of the time, even without professional equipment. This isn't a skill that requires dozens of attempts to get reasonably good at, even though genuine mastery - the kind bakery professionals have - takes considerably longer.
Comparing Notes With Other Bakers
If you're finding a specific failure pattern hard to shake even after several attempts, it can help to compare notes with other home bakers working through the same technique, whether that's a friend, a baking forum, or a local class. Because so much of croissant lamination depends on the specific conditions of an individual kitchen, someone else's experience with a similar climate or oven can sometimes surface a fix faster than working through the troubleshooting alone, purely because they've already encountered and solved a similar-sounding problem in a comparable setup.
When to Suspect the Recipe Itself
Occasionally, inconsistent results trace back not to technique but to an unreliable recipe - one with proportions that don't hold up well, vague timing instructions, or measurements that don't translate cleanly between volume and weight. If you've methodically ruled out temperature, chilling time, and ingredient quality and are still struggling, it's worth trying a different, well-tested recipe (such as the one in our classic croissant recipe) before concluding the problem is purely with your own execution.
Keeping Perspective on "Failure"
It's worth stepping back periodically and remembering that even a croissant with real lamination problems is still, fundamentally, a rich, buttery, yeasted pastry that most people would happily eat. The standard being chased here - dramatic, bakery-quality honeycomb layering - is a genuinely high bar, and falling short of it on any given attempt doesn't mean the effort or the result was wasted. Treating each batch as both something to enjoy and something to learn from, rather than purely as a pass-or-fail test, tends to make the whole process more sustainable and more enjoyable to keep improving at over time.
A Summary Table of Symptoms and Fixes
- Dense, no visible layers: Butter merged into dough - check kitchen temperature and chilling discipline.
- Uneven layers on one side: Butter block sizing or sealing issue during lock-in.
- Layered but heavy: Under- or overproofing - watch visual cues over the clock.
- Flat with pooled butter: Significant butter escape - see the dedicated leaking guide.
For the full process this troubleshooting builds on, see our classic croissant recipe, or head back to the complete croissant guide.
Latest