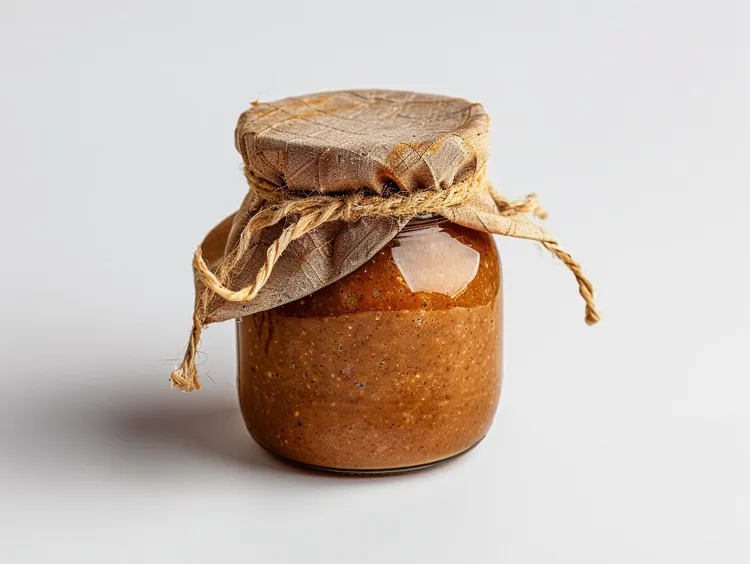
Homemade Chocolate Hazelnut Spread (Nutella-Style)
A from-scratch chocolate hazelnut spread recipe, with the skinning technique that makes it taste far better than skipping that step.
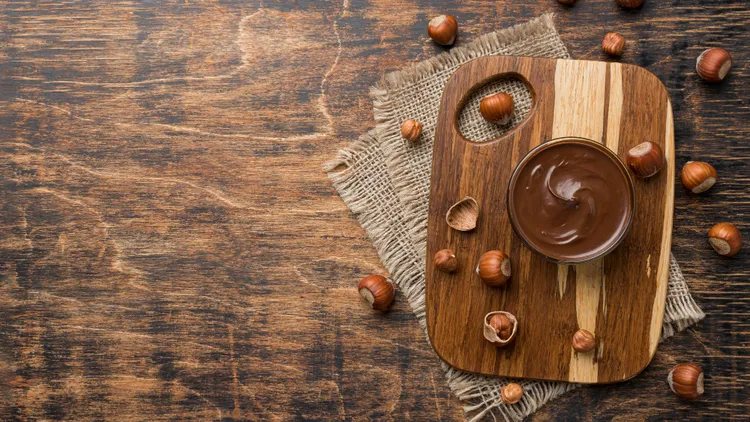
Homemade chocolate hazelnut spread tastes noticeably more like actual hazelnuts and less like sugar than the jarred version most people grew up on, mostly because a from-scratch batch isn't built around palm oil and sugar as the first two ingredients. The technique adds one extra step compared to a plain nut butter: removing the papery hazelnut skins, which otherwise leave a noticeably bitter edge behind.
Homemade Chocolate Hazelnut Spread
Prep time: 15 minutes | Blend time: 10 to 14 minutes | Makes: about 1.5 cups
Ingredients
- 2 cups raw hazelnuts
- 1/3 cup cocoa powder
- 1/3 cup powdered sugar, or 3 tbsp honey or maple syrup
- 1/4 tsp salt
- 2 to 3 tbsp neutral oil, as needed
- 1/2 tsp vanilla extract
Instructions
- Preheat the oven to 350F. Spread the hazelnuts on a rimmed baking sheet and roast for 12 to 15 minutes, until the skins crack and the nuts smell deeply toasted.
- While still warm, transfer the hazelnuts to a clean kitchen towel. Gather the corners and rub vigorously for 1 to 2 minutes to remove most of the skins. Not every skin will come off - that's fine, aim for removing the majority.
- Let the hazelnuts cool for 10 minutes, then add to a food processor. Process continuously, scraping down the sides every 2 to 3 minutes, until smooth, about 8 to 10 minutes.
- Add the cocoa powder, sweetener, salt, and vanilla. Blend until fully combined, another 1 to 2 minutes.
- If the mixture looks thick or dry once the cocoa is added, add oil one tablespoon at a time until it reaches a spreadable, glossy consistency.
- Transfer to an airtight jar. Store at room temperature for up to a week, or refrigerate for longer storage - it will firm up considerably when cold.
Notes
Cocoa powder is naturally dry and will noticeably stiffen the mixture once added, which is why oil is closer to a requirement than an optional add-in here, unlike most other recipes in this guide.
Why Skinning the Hazelnuts Matters
Hazelnut skins carry a distinctly bitter, slightly tannic flavor that becomes obvious once concentrated into a spread. Removing most of the skin before blending is the single biggest factor separating a homemade batch that tastes like the jarred original from one that tastes rougher and more astringent. The towel-rubbing method won't get every last fleck off, and that's genuinely fine - it's the bulk removal that matters most for the final flavor.
Cocoa Powder Choice
Natural cocoa powder gives a brighter, slightly more acidic chocolate flavor, while Dutch-process cocoa gives a smoother, darker, less acidic result closer to what most commercial chocolate hazelnut spreads use. Either works technically - Dutch-process tends to taste closer to the familiar jarred version if that's the specific target flavor.
Why This Needs More Oil Than Other Nut Butters
Cocoa powder absorbs moisture and fat, which stiffens the mixture noticeably compared to a plain hazelnut butter. Expect to need 2 to 3 tablespoons of oil in most batches, more than the "optional, only if needed" framing used for plain nut butters elsewhere in this guide. Neutral oil works fine; melted coconut oil adds a bit of its own flavor and firms up the texture more once refrigerated.
Common Mistakes
Skipping the skin removal step to save time is the most common shortcut, and it's the one that most affects the final flavor. Even a rough, imperfect towel-rub makes a real difference over skipping it entirely.
A second mistake is adding cocoa powder before the hazelnuts have fully smoothed into a butter on their own. Blend the hazelnuts alone to a smooth, glossy consistency first, then add the cocoa and sweetener - adding cocoa to a still-clumpy batch makes it much harder to judge how much oil is actually needed.
An Easier Skinning Method for Larger Batches
For a batch larger than 2 cups, working in two smaller towel-rubbing rounds rather than one large one tends to remove skins more thoroughly, since a smaller pile of hazelnuts inside the towel makes more consistent contact than a large pile where nuts in the center barely get rubbed at all. It's a small adjustment but makes a noticeable difference on anything beyond the base recipe size.
Making It Dairy-Free
This recipe is dairy-free as written, using only oil rather than any butter or cream, which is part of why it tends to taste closer to a dark, intensely chocolatey spread than the lighter, milkier flavor of some commercial versions. If a milkier flavor is specifically wanted, a tablespoon or two of powdered milk (dairy or a plant-based powdered milk alternative) can be blended in along with the cocoa powder.
Adjusting Sweetness
The listed sweetener amount lands on the moderately sweet side, closer to a dark chocolate spread than a very sweet one. For a sweeter result closer to some commercial chocolate hazelnut spreads, increase the sweetener by an additional 2 to 3 tablespoons, added gradually and tasted along the way, since preferences here vary widely and it's easier to add more than to take it back out once the batch is already jarred and cooling in the fridge.
Why Homemade Doesn't Stay as Shelf-Stable
Commercial chocolate hazelnut spreads are formulated specifically to stay smooth and spreadable at room temperature for months, largely through the use of palm oil, which stays semi-solid across a wide temperature range without fully hardening. This homemade version, using a neutral or coconut oil instead, behaves differently in the fridge - firming up more than the commercial version would at the same temperature. This isn't a flaw, just a genuine tradeoff for leaving out an ingredient most people are trying to avoid in the first place.
Scaling the Recipe
Doubling this recipe to 4 cups of hazelnuts works in a large-capacity food processor, though the skinning step becomes noticeably more time-consuming at that volume - budget closer to 20 to 25 minutes total for skinning alone on a doubled batch, working in smaller towel-rubbing rounds as described above.
Where to Find Raw Hazelnuts
Raw hazelnuts (also labeled filberts) are less universally stocked than almonds or cashews in a standard grocery store, and are more reliably found in the baking aisle, bulk bins, or specialty stores, particularly around the fall and winter holiday baking season when demand for them rises. Buying in advance and freezing is a reasonable way to keep a supply on hand if they're not consistently available locally.
Adjusting the Cocoa-to-Sweetener Ratio
For a darker, more intensely chocolatey result, increase the cocoa powder slightly and hold the sweetener steady or reduce it a touch. For a milder, sweeter, more kid-friendly version, keep the cocoa as listed but increase the sweetener by an extra tablespoon or two. Both directions work fine technically - it's purely a matter of matching the final flavor to what the batch is meant for.
Nut Oil vs Skin Oil in This Recipe
Because skinning removes a fair amount of the hazelnut's outer surface, a skinned batch can end up slightly less oily overall than an unskinned one of the same weight, which is part of why oil is treated as a near-requirement rather than optional here. If a batch seems to need noticeably more than the 3 tablespoons listed, that's a sign the skinning removed more of the nut's surface oil than typical, not a mistake in technique.
Comparing to Store-Bought Chocolate Hazelnut Spreads
Most mainstream chocolate hazelnut spreads list sugar and palm oil as the first two ingredients, with hazelnuts often appearing further down the list in smaller proportion than people generally assume. This homemade version flips that ratio, leading with hazelnuts and using cocoa and a moderate amount of sweetener rather than sugar as the dominant ingredient - the flavor difference is genuinely noticeable, leaning more toward real roasted hazelnut flavor with chocolate as a supporting note rather than the other way around.
Consistency Across Batches
Hazelnut size and oil content can vary somewhat between growing regions and seasons, which means the amount of oil needed to reach a spreadable consistency may shift slightly batch to batch even when following the same recipe exactly. Adding oil gradually and checking consistency as you go, rather than dumping in the full listed amount upfront, accounts for this variation reliably.
A Lower-Sugar Version
For a noticeably less sweet result, reducing the powdered sugar or honey by half and adding a small pinch of salt to compensate keeps the spread from tasting flat, while cutting overall sugar content meaningfully compared to both the standard version of this recipe and most commercial jars. The flavor leans more toward a dark, slightly bitter chocolate-hazelnut profile rather than a classic sweet spread, which some people specifically prefer.
Why This Recipe Is Worth the Extra Steps
Between the skinning step and the additional ingredients beyond a plain nut butter, this recipe takes noticeably more hands-on effort than most others in this guide - but it's also the one most people are surprised by afterward, since the flavor gap between a homemade batch and the familiar jarred version is larger here than with almost any other comparison in this entire guide. For anyone specifically motivated by wanting less sugar and no palm oil in a chocolate hazelnut spread, this is the recipe in the whole collection where that motivation pays off most obviously.
Planning Ahead for This Recipe
Because this recipe involves more individual steps than most others in this guide - roasting, skinning, blending the base, then blending in cocoa and sweetener - it's worth setting aside a slightly longer, uninterrupted stretch of time than a simpler single-nut butter would need, rather than trying to fit it into a few spare minutes between other tasks.
Storage
Because this recipe includes both cocoa and a sweetener, it behaves a bit differently in storage than the plain nut butters elsewhere in this guide, holding up well at room temperature for longer than most, though refrigeration still extends its usable life the furthest of any storage option available.
This spread keeps at room temperature for about a week, thanks to the sugar content acting as a mild preservative, or up to a month refrigerated, though it firms up considerably when cold and needs a few minutes at room temperature before it's easily spreadable again. See our storage guide for more on nut butter storage generally.
Making a Half Batch for a Smaller Household
Given the multi-step nature of this recipe, some people find it worth batching a slightly larger amount than a single 2-cup base whenever making it, simply to make the extra effort of skinning worthwhile across a bigger yield. Others prefer a smaller, more manageable half batch specifically because the skinning step scales down proportionally and becomes noticeably quicker to get through for a smaller household that won't finish a full batch before it needs refreshing.
What to Use It On
A jar of this made once tends to get requested again quickly once the household has tasted the difference from a store-bought version, and it rarely lasts as long in the fridge as the storage timeline above might suggest, especially in a household with anyone who has a serious sweet tooth for chocolate.
Beyond toast, this spread works well swirled into oatmeal, used as a dip for sliced apples or strawberries, or thinned slightly with warm milk for a quick hot chocolate. See our full uses guide for more ways to use nut and seed butters beyond the obvious.
For the complete roadmap across every nut and seed butter in this guide, see the complete nut butter guide, which covers the plain hazelnut and every other nut butter recipe this one draws its underlying technique from, along with the roasting and troubleshooting guidance that applies just as much here as anywhere else, and equipment recommendations for anyone whose processor is struggling with the skinning and blending steps this particular recipe requires, especially given how demanding the extended blend time can be on a weaker motor.
Nuts are common allergens. Always check ingredient labels for potential allergens and cross-contamination. If you have a nut allergy, avoid handling or consuming nuts and nut-based products, including homemade nut butter.
Latest