The Butter Block (Beurrage): Getting Lamination Right
How to make and size the butter block for croissant lamination correctly - the step most beginners get wrong, and why it matters more than any other stage.
The butter block, called the beurrage in French pastry terms, is the single piece of croissant-making most likely to go wrong on a first attempt - and getting it right matters more than almost any other step, since a poorly made butter block sets every later fold up to fail.
What the Butter Block Actually Does
The butter block is a flat, even slab of butter that gets sealed inside the dough and then rolled and folded together with it repeatedly. Every layer of butter in the finished croissant traces back to this one piece - if it's uneven, cracked, or the wrong size relative to the dough, those flaws propagate through every subsequent fold rather than smoothing themselves out.
Choosing the Right Butter
Butterfat content matters more here than in almost any other baking application. Standard American butter runs around 80 to 82% fat, while European-style butter (often labeled "high-fat" or with a butterfat percentage listed) runs 82 to 86%. That extra few percent means less water content, which translates directly into a more pliable block that's less prone to cracking and a finished croissant with better flavor and a crisper, more shattering texture. European-style butter isn't required, but it makes the entire lamination process noticeably more forgiving, especially for a first attempt.
Whatever butter you use, it needs to be genuinely cold going into this step - straight from the refrigerator, not softened at all.
Making the Block, Step by Step
- Cut the cold butter into slices or cubes for more even distribution.
- Toss the butter pieces with 2 tablespoons of flour. This small amount of flour helps the butter hold together as a cohesive mass rather than crumbling apart while you work it, and has a negligible effect on the final texture.
- Place the butter between two sheets of parchment paper, folded into an envelope roughly the size you want your finished block.
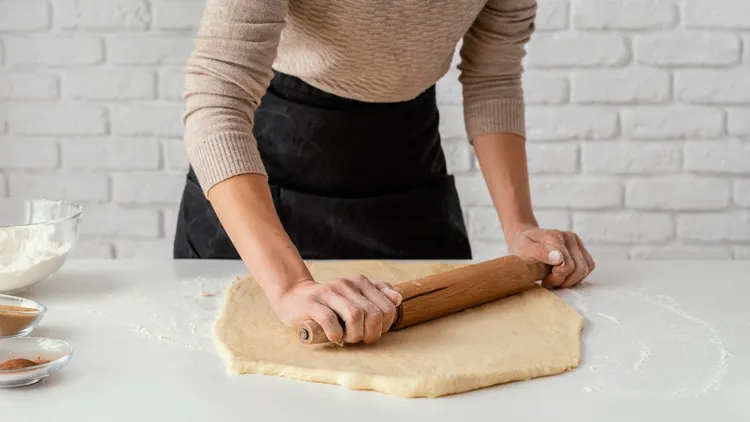
- Using a rolling pin, pound the butter first to flatten and soften it slightly without warming it, then switch to rolling it out into an even square or rectangle, typically about 7 inches square and 1/2 inch thick for a standard batch of dough.
- Work in short bursts. If the butter starts to feel soft, greasy, or sticky to the touch through the parchment, stop and refrigerate for 10 to 15 minutes before continuing.
- Once you have an even slab with square, well-defined corners, refrigerate it (still in the parchment) until firm - at least 30 minutes, up to a day ahead if convenient.
Getting the Size Right
The butter block should be roughly half the size of the rolled-out dough rectangle it's going into, so that when you fold the dough over it envelope-style, the dough fully encloses the butter with a bit of overlap to seal. A butter block that's too large won't get fully covered, leading to butter squeezing out the edges during the first roll. One that's too small leaves too much bare dough, which creates uneven layers - some sections with butter, some without.
Signs Your Butter Block Is in Good Shape
- Bends without cracking: Pick up a corner - it should flex slightly rather than snapping. If it cracks and crumbles, it's too cold; let it sit at room temperature for a few minutes before using.
- Doesn't feel greasy or leave butter residue on your fingers: If it does, it's too warm and needs more chilling before you continue.
- Even thickness throughout: Run your hand across the surface - noticeably thicker or thinner spots will translate into uneven lamination.
- Square, defined edges: Rounded or ragged edges make it harder to fully enclose in the dough.
Common Butter Block Mistakes
The most frequent mistake is working the butter too long in one stretch, letting it warm past a workable temperature without noticing, since butter warms faster than it looks like it's warming. The fix is simple discipline: work in short bursts and refrigerate between them rather than pushing through to get the block done in one go.
A second common mistake is making the block too thick, which sounds harmless but actually makes the first roll (locking the butter into the dough) much harder, since you're now trying to compress a thick butter layer down to match the thinner dough around it. A thinner, wider block laminates more evenly than a thick, small one.
A third mistake, more relevant to matching sizes, is not measuring at all and eyeballing both the dough rectangle and the butter block - small mismatches compound across three folds into a genuinely uneven final product. A ruler at this stage is worth the extra minute.
Locking In the Butter
Once both the dough and butter block are properly chilled and sized, roll the dough into a rectangle roughly twice the length of the butter block. Place the block in the center, rotated 45 degrees (so it looks like a diamond relative to the dough rectangle), and fold the four dough corners in to fully enclose it, pinching the seams closed. This "envelope" method distributes the dough evenly around the butter and is more reliable for home bakers than folding a single side over, which tends to leave one edge thinner than the others.
What Happens If the Butter Block Goes Wrong
If the butter cracks badly during rolling, small gaps in lamination are not usually fatal - the surrounding dough can partially compensate during the subsequent folds. If the butter smears or melts into the dough noticeably, though, that's harder to recover from, since the water in the butter has likely started incorporating directly into the dough rather than staying as a separate layer. In that case, the safest move is to refrigerate everything thoroughly and proceed carefully, understanding that the final layer definition may be less crisp than a fully successful lamination.
For a broader look at how these early mistakes show up in the finished croissant, see our guide to lamination mistakes, and if butter is actively leaking out during baking, our butter leaking troubleshooting guide covers the specific fixes.
Working Ahead
The butter block can be made up to a day in advance and kept refrigerated, well wrapped, until you're ready to laminate. This is often the easiest way to break up the croissant-making timeline - make the dough and butter block on the same evening, then start lamination the next morning with both components already properly chilled and ready to go.
Why the Envelope Method Beats Alternatives
There's more than one way to lock butter into dough, and it's worth understanding why the envelope method - folding all four dough corners in over a centered, diamond-oriented butter block - tends to work better for home bakers than the alternative of simply folding one long edge of dough over the butter like a book. The envelope method distributes the dough more evenly around the butter from the very first roll, since every edge of the butter gets roughly the same thickness of dough covering it. The book-fold method, by contrast, tends to leave one side of the butter with much less dough coverage than the other three sides, which can lead to butter breaking through on that thinner side during the very first roll after lock-in - before you've even gotten to the letter folds proper. If you've tried the book-fold method and struggled with butter poking through early, switching to the envelope method alone often resolves it.
Testing the Diamond Orientation
Positioning the butter block at a 45-degree angle relative to the dough rectangle - so it looks like a diamond rather than a square lined up with the dough's edges - isn't just a stylistic detail. It ensures the dough corners you fold over the butter meet in the center with enough overlap to seal fully, and it also means the eventual rolling direction (lengthwise, after lock-in) crosses the butter's edges rather than running parallel to them, which distributes pressure more evenly across the whole block during that first crucial roll.
What a Properly Sealed Package Looks Like
Once you've folded the dough corners over the butter and pinched the seams closed, you should have a fully enclosed, roughly square package with no visible butter showing anywhere along the edges or through the top. Run your fingers along every seam and press gently to make sure there are no gaps - even a small unsealed spot can become an exit point for butter during the first roll, when pressure on the package is at its highest relative to how thin the surrounding dough still is at that stage.
Butter Block Troubleshooting Quick Reference
- Butter keeps cracking while rolling: It's too cold. Let it sit briefly at room temperature, checking every minute or two, before continuing.
- Butter feels greasy or is sticking to the parchment: It's too warm. Refrigerate for 10 to 15 minutes before continuing.
- Block came out uneven in thickness: Refrigerate to firm it back up, then go over the thicker areas again with lighter, more controlled rolling strokes rather than trying to fix it by rolling harder in one pass.
- Block is the wrong size relative to the dough: It's better to re-roll the butter to the correct dimensions than to try to compensate by rolling the dough to an unusual size, since the dough's size is tied to the rest of your baking sheet and shaping plans.
Why Some Bakers Skip the Flour in the Butter
The small amount of flour tossed with the butter cubes before rolling is a common professional trick, but it's not strictly necessary if you're working with high-fat butter and moving efficiently - the flour mainly helps hold together softer, lower-fat butter that might otherwise separate into greasy streaks while rolling. If you're using a high-fat European-style butter and working in a cool kitchen, you can often skip this step with good results, though it doesn't hurt to include it, especially as a beginner while you're still developing a feel for how your specific butter behaves under the rolling pin.
Alternative Ways to Roll the Butter Block
Parchment paper is the most common way to contain the butter while rolling, but a large zip-top freezer bag, cut open along two sides, works just as well and some bakers find it easier to keep the butter fully enclosed without pieces squeezing out the sides. Whichever you use, the goal is the same: an enclosed surface that lets you apply even pressure without the butter sticking directly to your rolling pin or work surface, which would make the whole process considerably messier and harder to control.
How Butter Block Size Relates to Your Final Croissant Count
The specific dimensions given in this guide - a 7-inch square butter block for a standard batch of dough - are calibrated to produce about 10 to 12 croissants from the full lamination and shaping process. If you're scaling the recipe up or down, the butter block needs to scale proportionally with the dough, keeping the roughly 1:2 ratio (butter block size to rolled-out dough size before lock-in) consistent, rather than just adjusting one component and leaving the other as written.
Butter Temperature Right Before Lock-In
There's a specific window right before locking the butter into the dough where both components should be as closely matched in temperature and firmness as possible - this is more important at this specific moment than at almost any other point in the process, since it's the first time the two are combined directly. Take both the dough and the butter block out of the fridge at the same time, and if one feels noticeably firmer than the other, give the firmer one a few minutes at room temperature (checking frequently) rather than proceeding with a mismatch, which tends to cause problems during that critical first roll.
Once the butter block is sorted, the rest of lamination is mostly about consistent rolling and disciplined chilling between folds. For the complete process from mixing through baking, see our classic croissant recipe, or head back to the complete croissant guide.
Latest