Slow Cooker Pork Belly: Getting Crispy Skin After Low and Slow
Pork belly needs two things: enough time to render the thick fat layers, and high dry heat at the end to crisp the skin. The slow cooker handles the first part; the grill or oven handles the second.
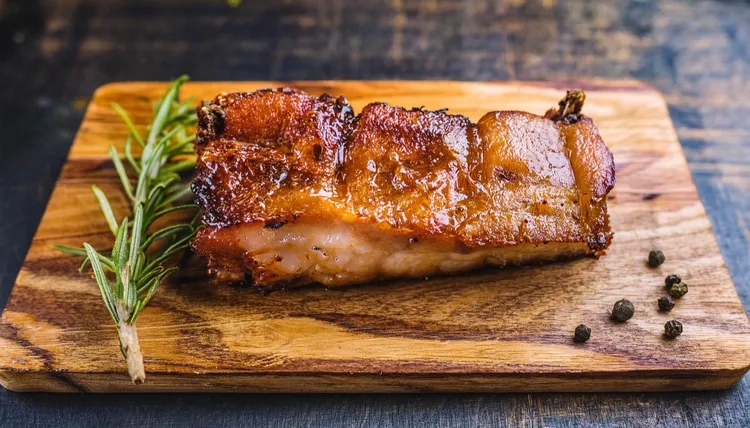
Pork belly is 40-50% fat by weight, depending on the cut. That fat doesn't disappear during cooking - it renders, meaning the fat cells break down and liquid fat disperses through the meat and into the braising liquid. Done properly, the result is meltingly tender layers of lean and fat, each bite rich without being greasy. The skin, meanwhile, sits dry on top throughout the slow cook and finishes under very high heat to puff into crackling. The two-stage approach isn't complicated, but both stages matter and neither can be skipped.
Choosing Pork Belly
Look for a piece with even thickness across its length - an uneven cut produces uneven cooking, with the thin end overdone before the thick end has finished rendering. Skin-on is essential if crackling is the goal. The skin should be pale and dry when you buy it. If it looks wet or has any sliminess, the crackling will be soft and difficult to crisp regardless of how long you finish it under heat.
Ask the butcher to score the skin if possible - parallel cuts through the skin at 1cm intervals, stopping just before the fat layer. If you're doing it yourself, a very sharp knife or a Stanley knife works better than a standard chef's knife. Score deeply enough to cut through the full skin thickness but stop before you reach the meat. Poor scoring is the most common reason crackling fails.
A 1kg skin-on piece feeds 3-4 people. A 1.5kg piece feeds 4-6. Pork belly is rich - portions are smaller than they appear. 150-180g cooked meat per person is usually enough.
Slow Cooker Setup
Pork belly in a slow cooker doesn't need a pre-sear. The skin won't benefit from browning at this stage since you're finishing it under very high heat anyway, and searing a large skin-on belly is awkward and messy. Season the meat side generously - not the skin - with salt, pepper, and your chosen spices. Good combinations: fennel seeds and garlic, Chinese five spice and ginger, smoked paprika and cumin.
Place the belly skin-side up in the slow cooker insert. The skin must stay above the liquid level for the entire cook - moisture on the skin during slow cooking makes crackling formation nearly impossible later. Add aromatics around the base of the meat rather than under it: sliced onion, garlic cloves, a bay leaf.
Add 150-200ml of liquid around the belly, not over it:
- Chicken or pork stock: Clean, neutral base that lets the pork flavour lead.
- Apple cider (dry): Adds mild sweetness and acid that cuts through the fat layer well.
- Pale ale or lager: Adds bitterness and body. Avoid very hoppy IPAs - the bitterness concentrates and can turn sharp.
- Water: Perfectly fine. The belly renders substantial fat and juice that flavour the liquid regardless of what you add.
For a full breakdown of braising liquid options and what each one contributes, see our braising liquid guide.
Timing
- Low setting: 7-8 hours. Best result. Fat renders slowly and the lean layers stay tender rather than stringy or dry.
- High setting: 4-5 hours. Works, but the texture across the fat layers is slightly less even.
The belly is done when a knife slides through the lean layers with no resistance and the fat looks translucent rather than white and dense. The skin will still be soft and pale - that's correct at this stage. Don't be tempted to extend the slow cook trying to crisp the skin; it won't crisp at slow cooker temperatures, and extending the time just risks overcooking the meat underneath.
For timing across other cuts and settings, see our full slow cooker timing guide.
Crisping the Skin: The Critical Step
This is where most slow cooker pork belly recipes fail - they underdescribe or rush the crackling stage. The skin needs to be completely dry and exposed to very high heat for long enough to puff and blister. Half measures produce a chewy, rubbery skin that defeats the point.
Carefully transfer the belly skin-side up to a wire rack set over a roasting tray. The rack elevates the skin away from any rendered fat that drips during finishing. Pat the skin completely dry with several sheets of kitchen paper - be thorough. If it looks shiny or greasy, wipe with a clean cloth. Let it sit uncovered at room temperature for 10-15 minutes to dry further. The drier the skin surface, the faster and more evenly it will crisp.
Best option if you have time: place the rack and tray uncovered in the fridge for 30-60 minutes after patting dry. A cold, very dry skin crisps faster and more evenly than one that's still warm from the slow cooker.
Oven method: Preheat to maximum - 230-250°C (450°F). Place in the upper third of the oven. Roast for 20-30 minutes. Watch closely in the final 10 minutes: the skin transforms quickly and the margin between perfect crackling and burnt crackling is 2-3 minutes. You should hear it crackling audibly. The surface should blister and puff into amber ridges.
Grill/broiler method: Position the belly 10-12cm from the element. Grill on high for 8-12 minutes, watching throughout. This method is faster than the oven approach and gives very even results but requires constant monitoring.
If the crackling is still chewy in patches after the allotted time, return it for another 5 minutes. Chewy crackling means the moisture hasn't fully driven out of the skin layer.
The Braising Liquid
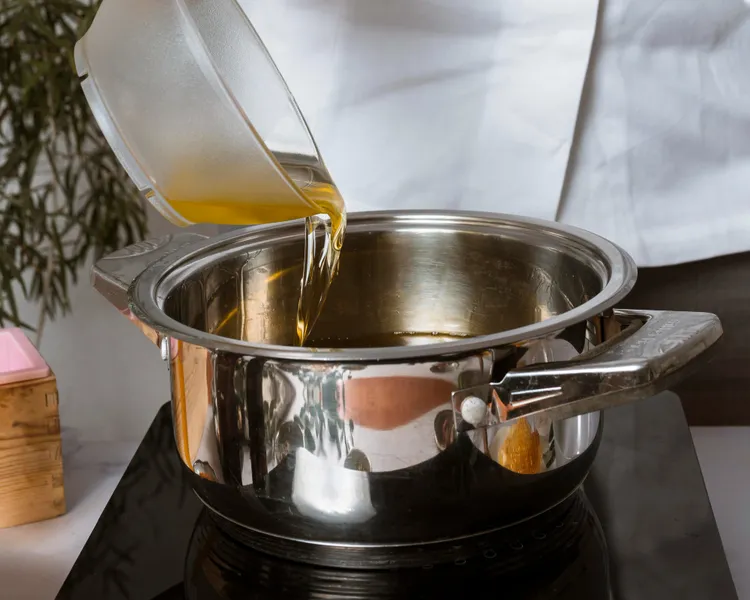
After removing the belly, you'll have 200-400ml of liquid in the slow cooker - pork fat, stock, and the moisture the meat released during cooking. Strain it, skim the fat (there will be a significant amount - pork belly renders a lot), and reduce the remainder in a small saucepan over high heat to sauce consistency. A teaspoon of apple cider vinegar stirred in at the end cuts through the richness. A teaspoon of soy sauce deepens the savoury baseline.
Macros (Estimates)
Per 180g serving cooked pork belly with crackling skin: approximately 580-640 kcal, 22-26g protein, 0g carbs, 52-58g fat. Pork belly is calorie-dense - it's not a lean protein source. Plan accordingly and serve alongside something lower in fat: steamed or boiled rice, pickled vegetables, a simple apple slaw, or a light cabbage salad to balance the plate.
Meal Prep Notes
The crackling does not reheat or store well - it loses crispness the moment it contacts moisture or goes into the fridge. Store any leftover crackling separately at room temperature, wrapped loosely, and eat within a day. The meat itself keeps for 4 days refrigerated and reheats well in a dry frying pan or oven at 160°C. Don't microwave pork belly - the fat seizes and the texture suffers. Freeze the meat only, without the skin; make fresh crackling when you reheat.
For batch-cooking strategy across a week of meals, see our braising meal prep guide. For the full science and technique behind low-and-slow cooking, see the complete braising guide.
Scoring the Skin: Why Technique Matters
Scoring determines whether crackling forms at all. Cuts that don't fully penetrate the skin leave it with no exit path for internal moisture - the skin stays chewy regardless of how long you finish it under heat. The cuts need to go fully through the skin layer, stopping just before the fat beneath.
Pork skin is tougher than it looks and a regular kitchen knife requires significant pressure and tends to slip. A Stanley knife or box cutter handles it cleanly with little effort. Alternatively, ask the butcher to score it on their band saw when you buy the piece - this produces perfectly even cuts with no risk.
Spacing at 1cm intervals is standard. Closer means more crackling ridges but more risk of burning before the skin fully puffs. Wider spacing means fewer ridges but each one is more substantial. 1cm is the reliable middle ground for most pork belly thicknesses.
Seasoning Variations
Pork belly takes to a wide range of spice profiles, and the slow cooker makes marinating largely irrelevant - the aromatics have hours to penetrate the meat.
Chinese-style: five spice, ginger, garlic, and a tablespoon of soy sauce rubbed into the meat side. Add a splash of Shaoxing wine to the braising liquid. Finish with a hoisin glaze brushed over the meat before the crackling stage.
Italian-style: fennel seeds crushed with garlic, salt, and black pepper - the classic porchetta seasoning. Add white wine and sage leaves to the braising liquid. Serve with polenta.
Korean-inspired: gochujang, sesame oil, garlic, and ginger rubbed into the meat side. Plain water or chicken stock as the braising liquid. The spice paste builds its own complexity during the slow cook.
The skin is always treated the same way regardless of meat-side flavouring: salt rubbed into the scored lines, then completely dry before the high-heat finish.
What Goes Well With Pork Belly
Pork belly's richness demands accompaniments that cut through it. Acidity and crunch are the key principles. Apple sauce, pickled cucumbers, sharp coleslaw, kimchi, or a vinegar-dressed cabbage salad all work well. Steamed jasmine rice absorbs the braising liquid cleanly. Avoid creamy or rich sides - the belly provides enough of both already.
Serving Suggestions
The combination of meltingly soft meat and crispy crackling means pork belly doesn't need much alongside it. Keep the accompaniments simple and choose things that cut through richness rather than adding to it.
Asian-style: steamed jasmine rice, pickled daikon and carrot (do chua), sliced spring onions, and a dipping sauce of the reduced braising liquid with a splash of rice vinegar. The acidity of the pickle is essential to balance the fat.
European-style: braised white beans or puy lentils cooked in the strained braising liquid, wilted greens (cavolo nero or kale work well), and a sharp mustard dressing on the side. The beans absorb the pork flavour from the liquid and become something special in their own right.
If serving as a main course, 150-180g of cooked pork belly per person is generous given the richness. Err on the side of smaller portions and let people come back for more - it's easy to over-serve this cut. The braising liquid, reduced to a glaze, is the component that makes the plate cohesive: drizzle it over both the meat and the accompaniments.
Common Crackling Problems and Fixes
Crackling didn't form or stayed chewy: the skin was not dry enough before the high-heat stage. Next time, refrigerate the scored, patted-dry belly uncovered for at least an hour before finishing under heat. Alternatively, ensure the score marks go fully through the skin - shallow scoring is the other common culprit.
Crackling burnt before the meat heated through: the belly was too close to the grill element, or the oven temperature was too high. Position further from the heat and extend the time at moderate heat before the final blast.
Fat Rendering: What's Happening During the Slow Cook
The fat in pork belly renders at a lower temperature than most people realise - fat cells begin breaking down at around 60°C, well within the slow cooker's operating range. Over 7-8 hours at low setting, the thick fat layers between the lean meat transform from dense, waxy white tissue into translucent, semi-liquid fat that has partially dispersed through the surrounding meat. What looked opaque and solid in the raw belly becomes transparent and silky in the cooked one.
Not all of this fat stays in the meat. A significant proportion renders out into the braising liquid, which is why there's so much fat to skim after the slow cook is complete. The fat that remains dispersed through the meat is what gives the finished belly its characteristic richness and keeps the lean layers moist. The lean layers in pork belly have very little moisture of their own - without the surrounding fat they would become dry and tough at any cooking temperature.
Finally, the braising liquid deserves more credit than it usually gets in pork belly recipes. After skimming the substantial rendered fat, the remaining liquid contains dissolved pork proteins, caramelised sugars from the aromatics, and the flavour compounds from whatever wine or stock you used. Reduce it to a glaze in a small saucepan and you have a sauce that works over rice, noodles, or roasted vegetables throughout the week. Don't discard it - it's a secondary benefit of the cook that requires almost no extra effort to capture.
Latest